Design Handoff to Claude Code, Cursor & Codex (2026)
Six design handoff methods for Claude Code, Cursor and Codex, from screenshots and DESIGN.md to live MCP connections and two-way design-code sync.
The short answer: choose by what the agent needs
Use a screenshot for one existing screen. Use DESIGN.md for persistent brand rules. Use a Claude Design bundle for a prototype created in Claude. Use Figma MCP plus Code Connect when Figma remains the design source. Use Google Stitch MCP for free text-to-UI exploration. Use v0 or Lovable when running code is the deliverable. Use Mowgli when you need a whole multi-screen app designed from a written description, including every screen and state, with two-way synchronization.
These choices work with Claude Code, Cursor and Codex, but they carry different amounts of context.
The six handoff mechanisms are screenshots, DESIGN.md, a Claude Design bundle, live design MCP, exported code and a two-way design source. They range from pixels alone to screens, states, code and a product specification that can move in both directions.
We make Mowgli.
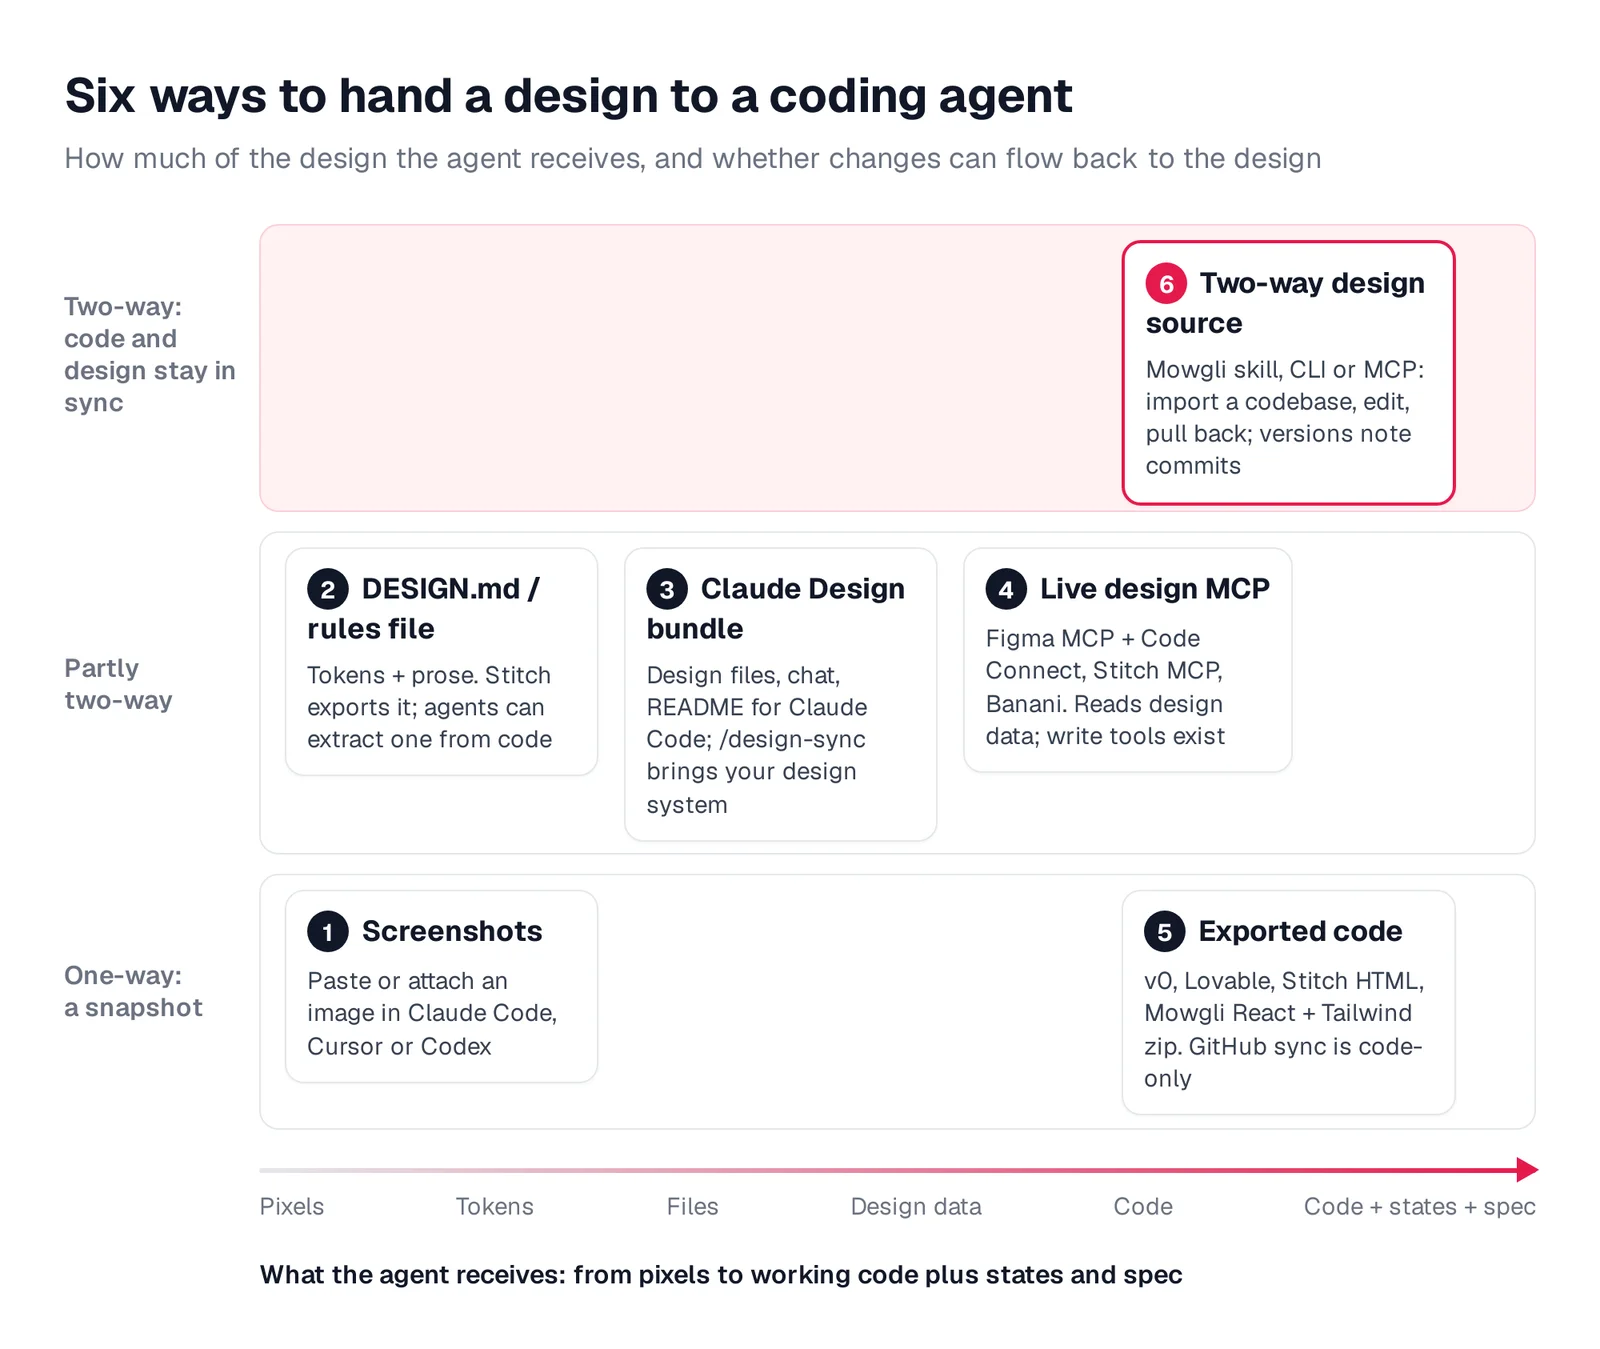
Caption: The six handoff methods. Left to right: how much of the design reaches the agent. Bottom to top: whether changes can flow back into the design.
What a design handoff must carry
A design handoff translates an approved design into context that Claude Code, Cursor or Codex can use. That context might include images, tokens, visual rules, design files, live design-tool data, generated screen code, a screen and state inventory, product journeys or a data model.
Evaluate any handoff with three questions:
- What crosses the boundary?
- What must the coding agent infer?
- Can implementation changes return to the design source?
A static frame might communicate layout and copy while omitting behavior. A style file might specify exact colors and spacing while saying nothing about which screens exist. Even a collection of polished screens can omit empty, loading, error and permission states.
Missing context forces the coding agent to make product and visual decisions during implementation. Those guesses compound across later screens and help explain why AI-built apps look the same.
1. Screenshots: fastest for one existing screen
A screenshot gives the coding agent pixels. It must infer layout, spacing, color, typography and behavior from those pixels.
This is the fastest option when you already have one screen to reproduce inside an existing application. It does not provide exact token values, interactions, cross-screen rules or any state that is not visible.
In Claude Code, drag an image into the window, paste it with Ctrl+V, use Alt+V on Windows and WSL, or provide a file path. In Cursor, drag the file into agent chat or paste it from the clipboard. With the Codex CLI, run codex -i screen.png "...". Add several images with --image a.png,b.png; Composer paste is also supported.
Use this prompt to constrain guesses:
Implement this screen from the attached image. Use our tokens and
components; never copy raw hex values. Before coding, list every
value you had to guess (spacing, colors, font sizes) and every state
the image does not show (loading, empty, error, permission denied).
Ask me about those instead of inventing them.
Screenshots become harder to manage as the product grows. A human must keep supplying the missing screens, rules and states, then check that the implementation stays consistent across them.
2. DESIGN.md: portable design rules for every session
DESIGN.md is an open Google Labs format under Apache-2.0 and is currently alpha. It combines YAML front matter and Markdown to describe color, typography, rounding, spacing and component tokens.
Stitch maintains one DESIGN.md per project and includes it with generated screens in a project export. The file gives a coding agent exact tokens and written usage rules. It does not provide a complete screen inventory, screen-specific copy, behavior or loading, empty and error states. That is why DESIGN.md is not enough on its own.
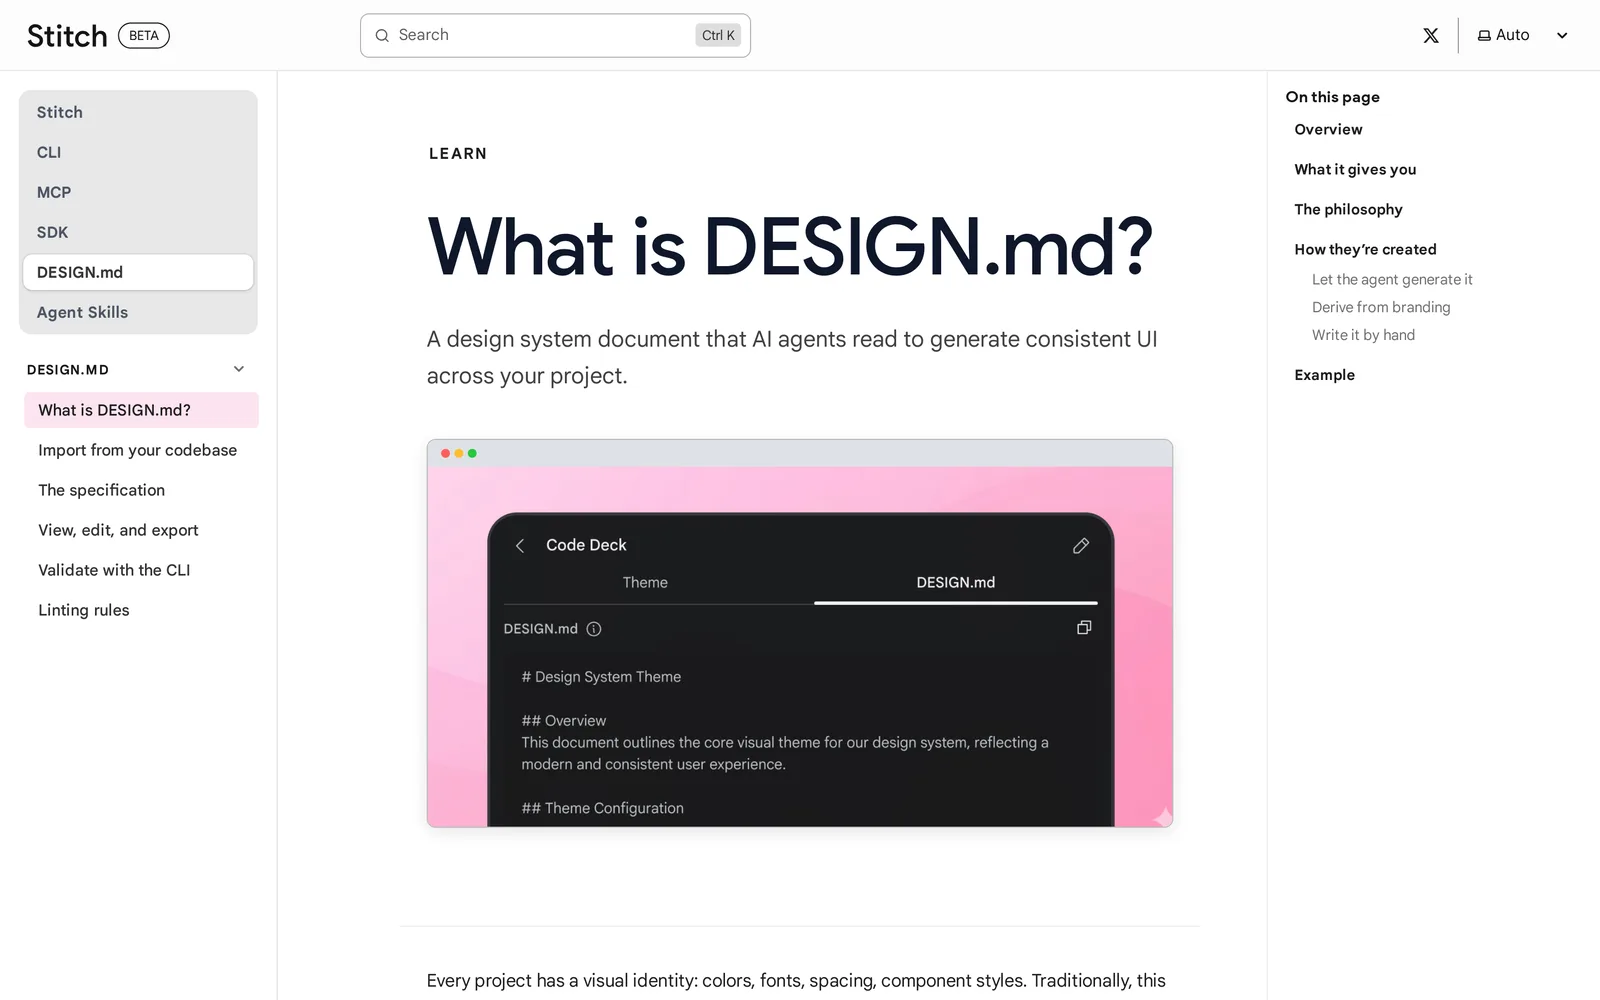
Caption: Stitch's DESIGN.md docs. Source: Google Stitch website, captured October 2026.
For Claude Code, add @DESIGN.md to CLAUDE.md. Imports are expanded at launch, and AGENTS.md is read when CLAUDE.md is absent. For Codex, reference DESIGN.md from AGENTS.md, which Codex reads before work begins. In Cursor, use AGENTS.md or reference @DESIGN.md from .cursor/rules.
Validate the file and export Tailwind-compatible CSS with:
npx @google/design.md lint DESIGN.md
npx @google/design.md export --format css-tailwind DESIGN.md
The format is free. Stitch is free with a daily credit limit that resets at midnight UTC. Use this method when consistency in colors, typography and component rules matters across sessions or across several coding agents.
3. Claude Design: hand off a Claude prototype as a bundle
Claude Design is an Anthropic Labs product launched on April 17, 2026. It creates designs and prototypes in claude.ai, then packages them for implementation.
Its Handoff to Claude Code flow offers "Send to local coding agent" and "Send to Claude Code Web." The resulting bundle contains design files, chat history, an interpretation README and a bundle URL inside a pasteable prompt. You can use that prompt with local Claude Code or another coding agent, including Cursor and Codex.
This is a point-in-time handoff. Intent is represented through the chat and README rather than a structured inventory of screens, states and data. Separately, /design-sync can import a React-component design system into Claude Design.
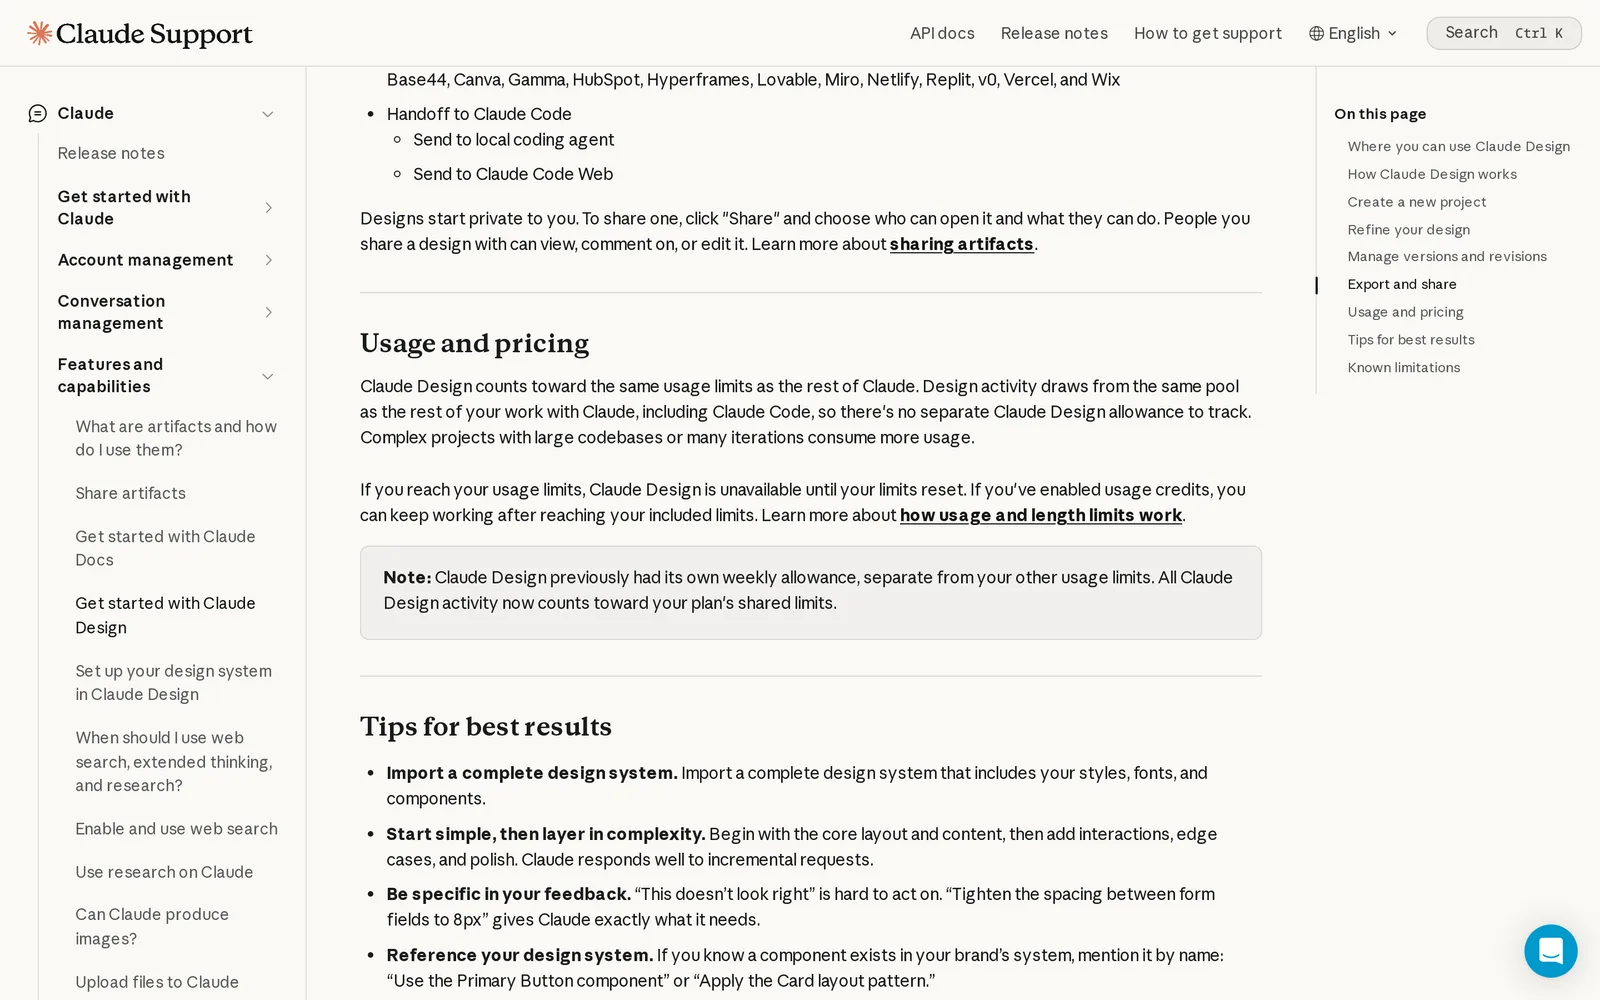
Caption: Claude Design's handoff options and usage note. Source: Claude help center, captured October 2026.
Claude Pro costs $20/mo, or $17/mo billed yearly. Claude Design is also included in Max, Team and Enterprise, and Design shares Claude usage limits with Claude Code.
Choose this route for a prototype or individual feature created in Claude and then implemented through the Claude Code UI design workflow.
4. Live MCP servers: work from an active design source
An MCP server lets the coding agent query a design tool while it implements the interface. See the broader MCP servers for UI design guide for setup patterns.
Figma MCP plus Code Connect
Figma MCP can provide context for a layer or current selection, variables, styles, a screenshot and an XML outline. Code Connect maps a Figma component to its corresponding repository component.
Figma also has a write path. Tools such as generate_figma_design can return code-rendered UI to the Figma canvas.
Install the Cursor plugin with /add-plugin figma or the Claude Code plugin with claude plugin install figma@claude-plugins-official. The remote server is https://mcp.figma.com/mcp.
Starter seats and View or Collab seats on any plan receive up to 20 tool calls a month. Dev and Full seats receive 200 a day on Professional and Organization, or 600 a day on Enterprise.
A Professional Dev seat costs $12/mo billed yearly. Code Connect requires a Dev or Full seat on Organization or Enterprise; an Organization Dev seat costs $25/mo billed yearly.
Figma MCP works best when your team actively maintains components, variables and approved frames in Figma. Only designed frames and states are available, and frames do not inherently contain product flows or a data model. See the Figma to Claude Code workflow.
Google Stitch MCP
The Stitch remote server is https://stitch.googleapis.com/mcp. Its tools include list_screens, get_screen, generate_screen_from_text, edit_screens, generate_variants and upload_design_md.
Each screen result includes a complete <html> document, a Tailwind CSS configuration specific to the design and an image. The coding agent then converts that HTML into React or another framework.
Setup uses an API key from Stitch settings or OAuth through gcloud. Stitch also provides a /stitch skill that can capture routes from a running development server onto the canvas, then extract and synchronize DESIGN.md from code.
The primary unit remains one HTML screen. Application behavior and data stay outside that screen. Stitch is a strong fit for free exploration where the coding agent also generates screens. For larger projects, plan for multi-screen consistency in Stitch.
Banani MCP
Banani lets you select screens, run its connection command and connect them to Claude Code, Cursor and Codex. MCP is included on all plans, and paid plans start at $12/mo billed yearly.
5. Exported code: when code is the handoff
Sometimes implementation files are the handoff. This can mean a running application from an app builder or design output packaged as screen code.
App builders: v0 and Lovable
v0 and Lovable produce running applications and synchronize with GitHub at the code level. Clone the repository, then continue with Claude Code, Codex, Cursor or another coding agent. Lovable synchronizes one branch at a time.
Once the coding agent changes the repository, rendered code becomes the visual reference. There is no separate approved design source to compare against.
v0's free tier includes $5 of one-time credits and 7 messages a day. v0 Plus costs $30/user/mo. Lovable's free tier includes 5 build credits a day, up to 30 a month.
Design tools that export implementation files
Stitch exports HTML and CSS with Tailwind. Mowgli can export every screen as React plus Tailwind through an AI package, Figma, a Vite plus React plus Tailwind prototype, images, or code accompanied by the product specification in PDF and Markdown.
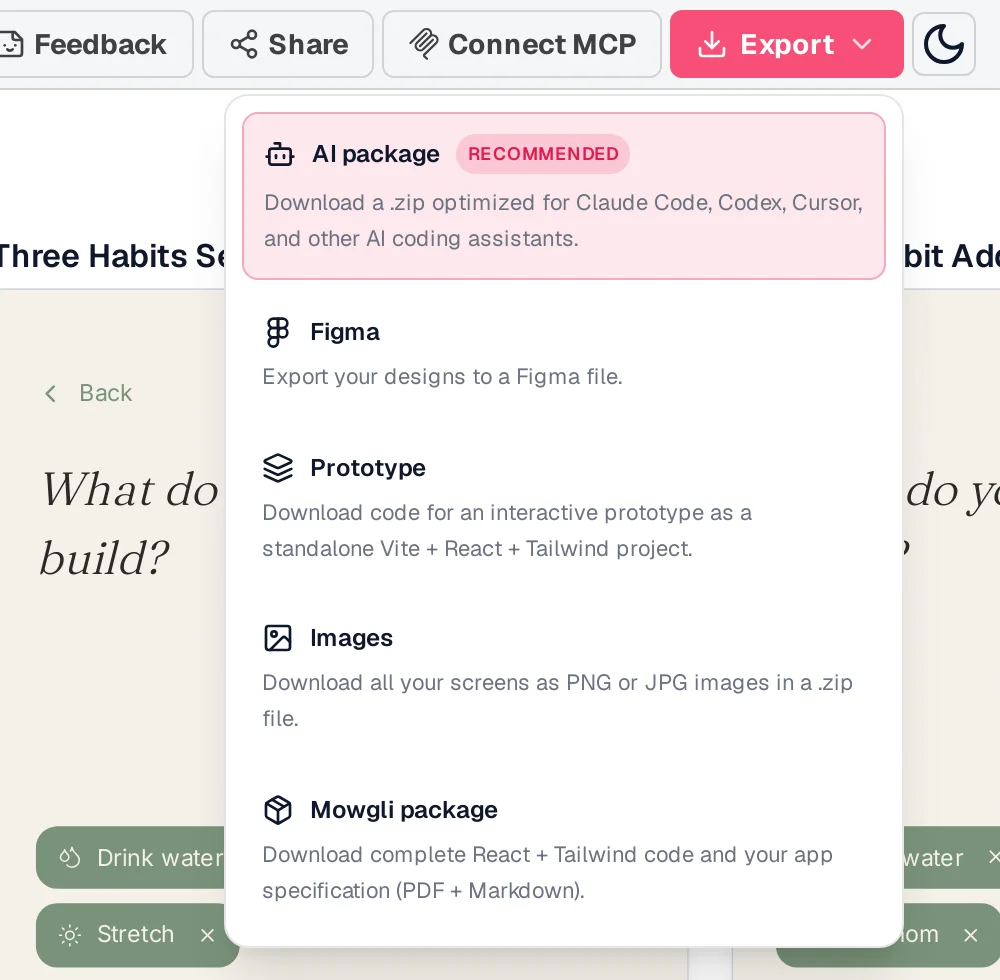
Caption: Mowgli's Export menu on the habit tracker demo project (captured October 2026).
The AI package is optimized for Claude Code, Codex and Cursor. A 12-screen habit tracker package has this structure:
README.md  AGENTS.md  CLAUDE.md  GEMINI.md  SPEC.md
screens/WelcomeScreen.tsx  screens/TodayScreen.tsx  screens/ProgressScreen.tsx
screens/FriendsScreen.tsx  screens/SettingsScreen.tsx  ...(12 screens)
screens/images/onboarding-sprout.png
CLAUDE.md contains See @AGENTS.md. The instructions ask the coding agent to conduct a stack interview, create an IMPLEMENTATION_PLAN.md organized vertically by user journey, treat screen files as strict design references and use SPEC.md as the source of truth for behavior and requirements.
States are documented directly in each screen:
/**
 * States:
 * - default: Mixed completion state with header date, week strip ...
 * - allHabitsChecked: All habits checked with warm acknowledgment line below
 * - noActiveHabits: Empty state with warm prompt and two action buttons
 * - reviewCardVisible: Weekly review card at top above habit list
 * - dayDetailOpen: Day detail overlay for backfilling a past day
 */
const TodayScreen: React.FC<ScreenProps> = ({ state }) => { ... }
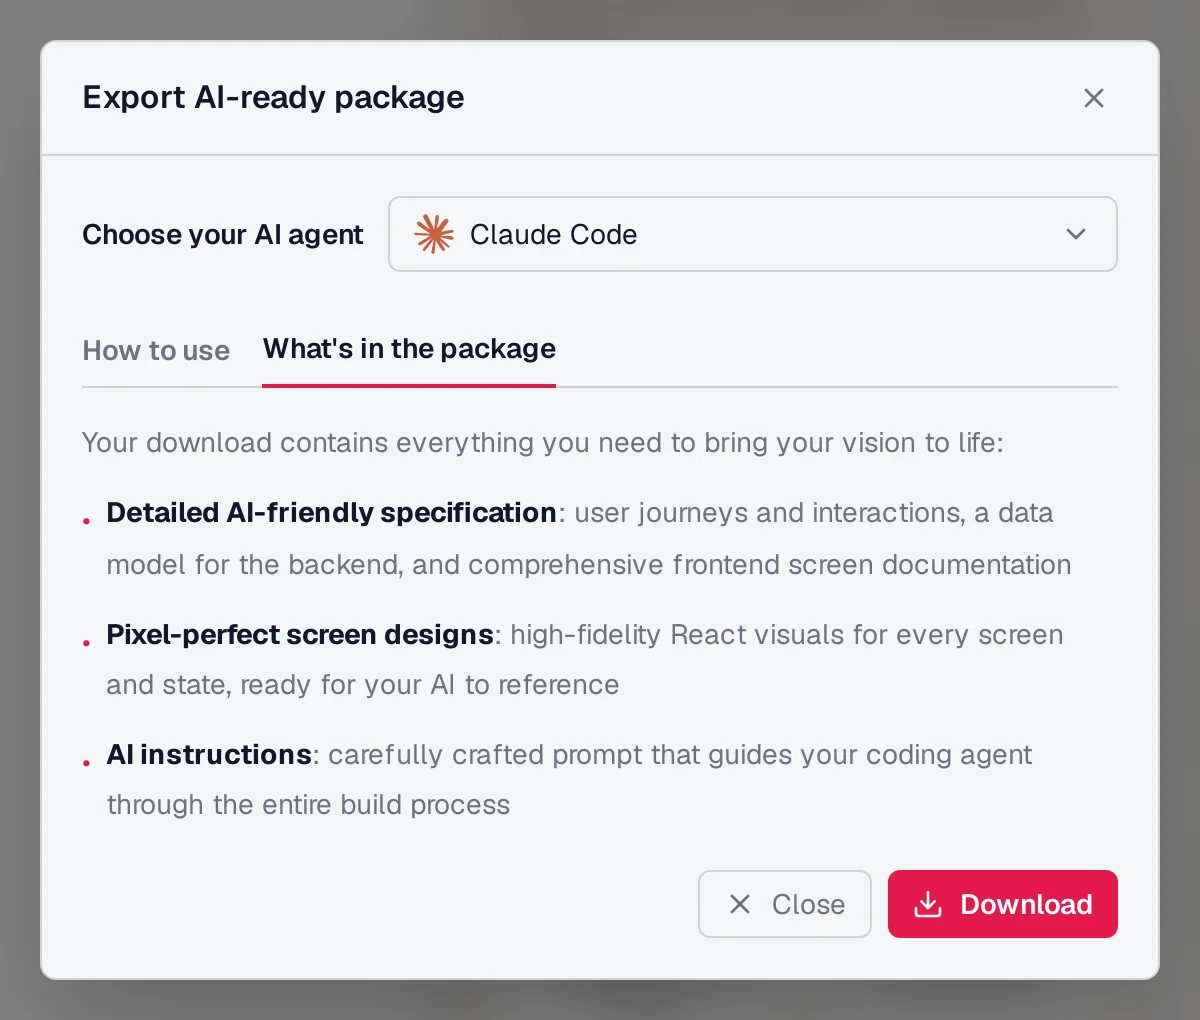
Caption: What the AI package contains, per Mowgli's export dialog (captured October 2026).
This is useful when implementation begins from approved screens in one download. Compare other AI design tools that export React and Tailwind.
6. Mowgli: design every screen, then synchronize design and code
Mowgli turns a product idea into a full multi-screen app design: it writes the spec first, then designs every screen.
You can start with a written description, an imported Figma file or an existing codebase imported through the agent skill or MCP. A guided questionnaire produces a PRD or spec covering user journeys, product constraints and the data model. You then choose from a moodboard with 16+ styles, steer the visual direction and generate every screen and state on an infinite canvas.
A project can contain 30+ screens and states, including empty and error states. You can edit through chat, review version history, create an interactive prototype and export to Figma, React plus Tailwind or coding agents.
The coding-agent connection is available through the MCP server at https://app.mowgli.ai/mcp, the skill installed with npx skills add mowgli-ai/skills, or the mowgli-cli package. It works with Claude Code, Claude.ai, Codex, Cursor and any MCP client.
The agent-readable project includes SPEC.md for the pitch, user journeys and data model; frontend.xml for screens and their states; and one <ScreenId>.tsx React plus Tailwind component per screen. Each component uses one state prop to switch states.
Existing source files can be pushed into the design, and designs can be pulled back into the codebase. For example:
mowgli -p <id> edit -f src/pages/TodayPage.tsx
The screen, state inventory and product spec update together. Each edit creates a design version, and its metadata records the corresponding git commit shorthash.
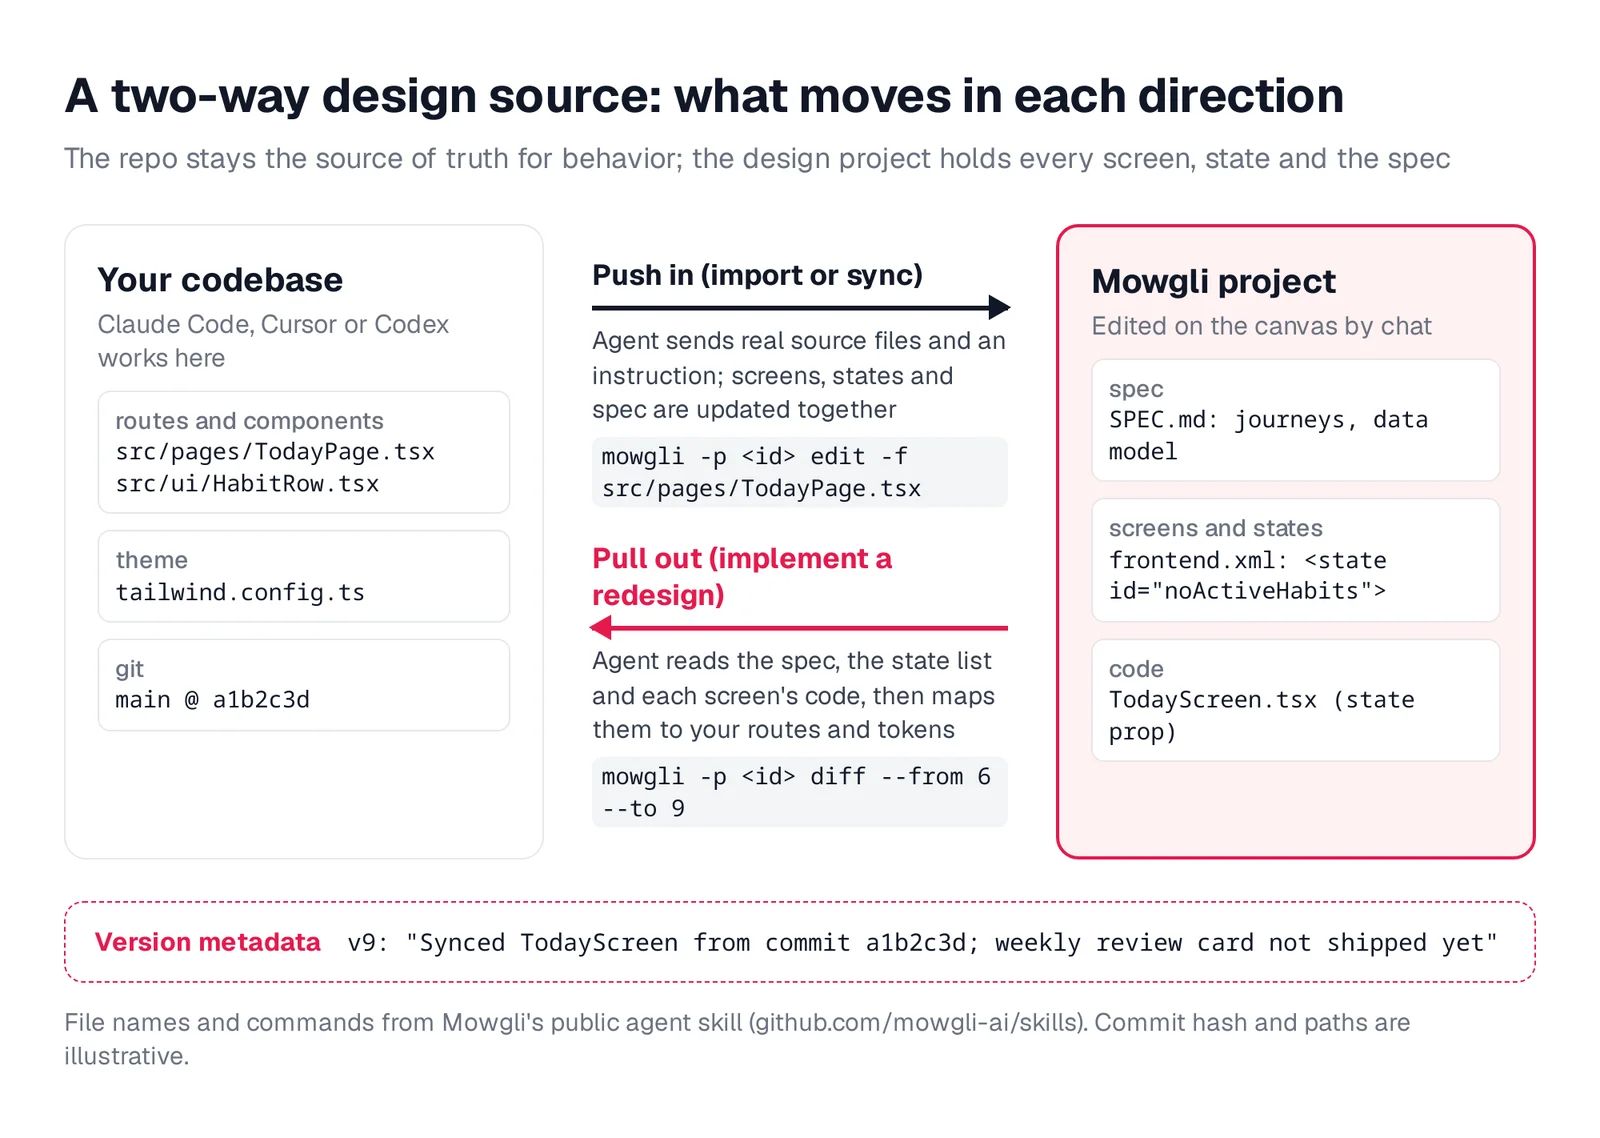
Caption: What moves in each direction. File names and commands come from the public agent skill; the commit hash is illustrative.
To connect, open Connect MCP, choose Claude Code, Cursor or Codex, and paste the generated prompt. Try the skill first with npx skills add mowgli-ai/skills. Use npx mowgli-cli --help as the CLI fallback or https://app.mowgli.ai/mcp for commandless MCP clients. A browser approval links the account.
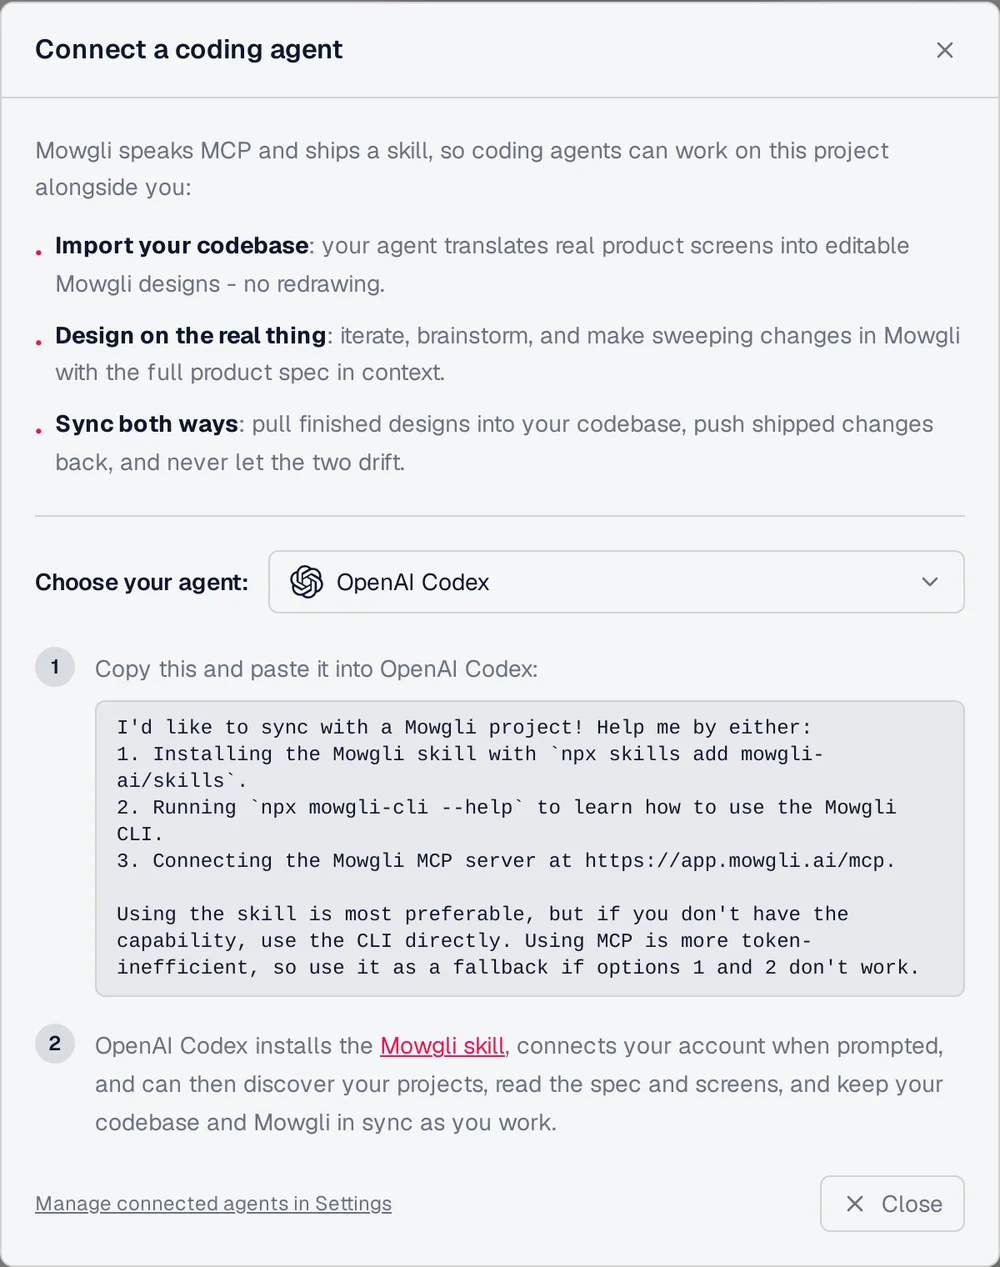
Caption: Mowgli's Connect a coding agent dialog with Codex selected (captured October 2026).
The practical distinction is scope. Stitch captures routes and synchronizes DESIGN.md. Figma writes code-rendered UI as canvas layers. Claude Design imports a React design system with /design-sync. v0 and Lovable synchronize application code through GitHub. Mowgli synchronizes screens as code, the state inventory and the product specification together.
Mowgli is free to start with 300 credits; credit packs start at $12; plans start at $15/mo. Connecting a coding agent is included on the free plan. The 300 credits can produce a full wireframe app if you skip the moodboard and design-proposal step, or import and change an existing codebase through the skill or MCP.
Mowgli designs and prototypes; to host and ship, you hand off to a builder or coding agent (Claude Code, Codex, Cursor, Lovable).
See the MCP connection, agent skill, Claude Code workflow, Cursor workflow and Codex workflow.
Side-by-side: what each method carries
| Method | Layout and visuals | States | Spec and data model | Return path | Cost |
|---|---|---|---|---|---|
| Screenshots | Approximate visuals | Only visible states | None | None | Free |
| DESIGN.md | Tokens and rules | No screen states | Style guidance only | Can be re-extracted from code | Free, open format |
| Claude Design bundle | Prototype visuals | States present in prototype | Chat plus README | Design-system import through /design-sync | Claude Pro $20/mo and up |
| Figma MCP | Selection-level context | Existing frames | No product spec or data model | Write-to-canvas tools | Figma seat; Dev seat from $12/mo |
| Stitch MCP | HTML and image per screen | Generated screens | No product spec or data model | Route capture and DESIGN.md synchronization | Free, daily credit limit |
| v0 and Lovable | Running application | Implemented states | Data model in application code | Two-way GitHub synchronization at code level | Free tiers; v0 Plus $30/user/mo |
| Mowgli | React plus Tailwind for every screen | Every state listed per screen | SPEC.md with journeys and data model | Screens, states and spec flow both ways | See pricing above |
Prices are from each vendor's pricing page, October 2026.
Verdict by job
For a written description that must become a full multi-screen design, choose Mowgli. It provides the product specification plus every screen and state as agent-readable files, with two-way MCP synchronization and versions tied to commits.
For a Figma-owned design system, choose Figma MCP plus Code Connect. It fits teams that actively maintain their components and variables in Figma.
For free, agent-driven screen generation, use Google Stitch MCP plus DESIGN.md. Plan to convert its HTML output into your selected framework.
For a prototype created in Claude, use the Claude Design handoff bundle. For one existing screen, attach a screenshot and use the guess-limiting prompt above. For a running application rather than a separate design source, use v0 or Lovable with GitHub.
Before implementation, inventory every empty, error, loading and permission state. Then build a screen by state matrix so the coding agent can distinguish a complete product from a collection of happy-path frames. Use the empty, error and loading states checklist and its screen by state matrix.
FAQ
What is the best design handoff method for Claude Code, Cursor or Codex?
The best method depends on the deliverable. Use a screenshot for one screen, Figma MCP plus Code Connect for an existing Figma workflow, Mowgli for a whole app with screens, states and a spec, or v0 and Lovable when running code is the main deliverable.
Which AI design tools hand off to Claude Code, Cursor and Codex?
Mowgli supports MCP, a CLI, an agent skill and exported React plus Tailwind. Figma offers MCP and Code Connect. Google Stitch provides MCP, DESIGN.md and HTML. Claude Design provides a handoff bundle, Banani provides MCP, and v0 and Lovable hand off GitHub repositories.
Is DESIGN.md enough for a coding agent?
No, DESIGN.md is not enough for a complete application handoff. It carries tokens and visual rules but not a full screen inventory, screen states or behavior. Pair it with readable screens and a product specification.
How do I keep design and code in sync with an AI coding agent?
Use a source that accepts changes from the coding agent and record which git commit corresponds to each design version. Mowgli synchronizes screen code, state lists and the specification; Stitch can recapture routes and resynchronize DESIGN.md.
How do I give Codex a design to build?
Put persistent rules in AGENTS.md and reference DESIGN.md. For one screen, attach an image with codex -i. For multi-screen work, connect Mowgli, Figma or Stitch over MCP. See Codex for frontend design.
What information should a design handoff include?
A complete handoff should include visual rules, exact tokens, a screen inventory, loading, empty, error and permission states, user journeys, behavior, product constraints and the data model. It should also identify the source of truth and define how implementation changes return to it.
Sources
- Claude Code overview
- Claude Code common workflows
- Claude Code memory
- Cursor
- Cursor agent prompting
- Cursor rules
- OpenAI Codex
- Codex image inputs
- Codex AGENTS.md configuration
- Google Labs DESIGN.md repository
- Google Stitch
- Stitch DESIGN.md overview
- Stitch DESIGN.md usage
- Stitch DESIGN.md CLI
- Stitch MCP reference
- Stitch MCP guide
- Stitch MCP setup
- Stitch CLI overview
- Claude Design
- Claude Design announcement
- Claude Design getting started
- Claude Design design-system setup
- Claude Design prototype handoff tutorial
- Claude pricing
- Figma MCP installation
- Figma MCP tools and prompts
- Figma MCP access and rate limits
- Figma Code Connect
- Figma pricing
- Banani pricing
- v0 GitHub integration
- v0 pricing
- Lovable GitHub integration
- Lovable plans and credits
- Mowgli agent skill
- Mowgli
- Mowgli pricing