Explain your initial idea
Start by explaining your initial idea — what do you want to build? We will ideate on this with you, but it helps if you give as much detail as possible in this initial stage.
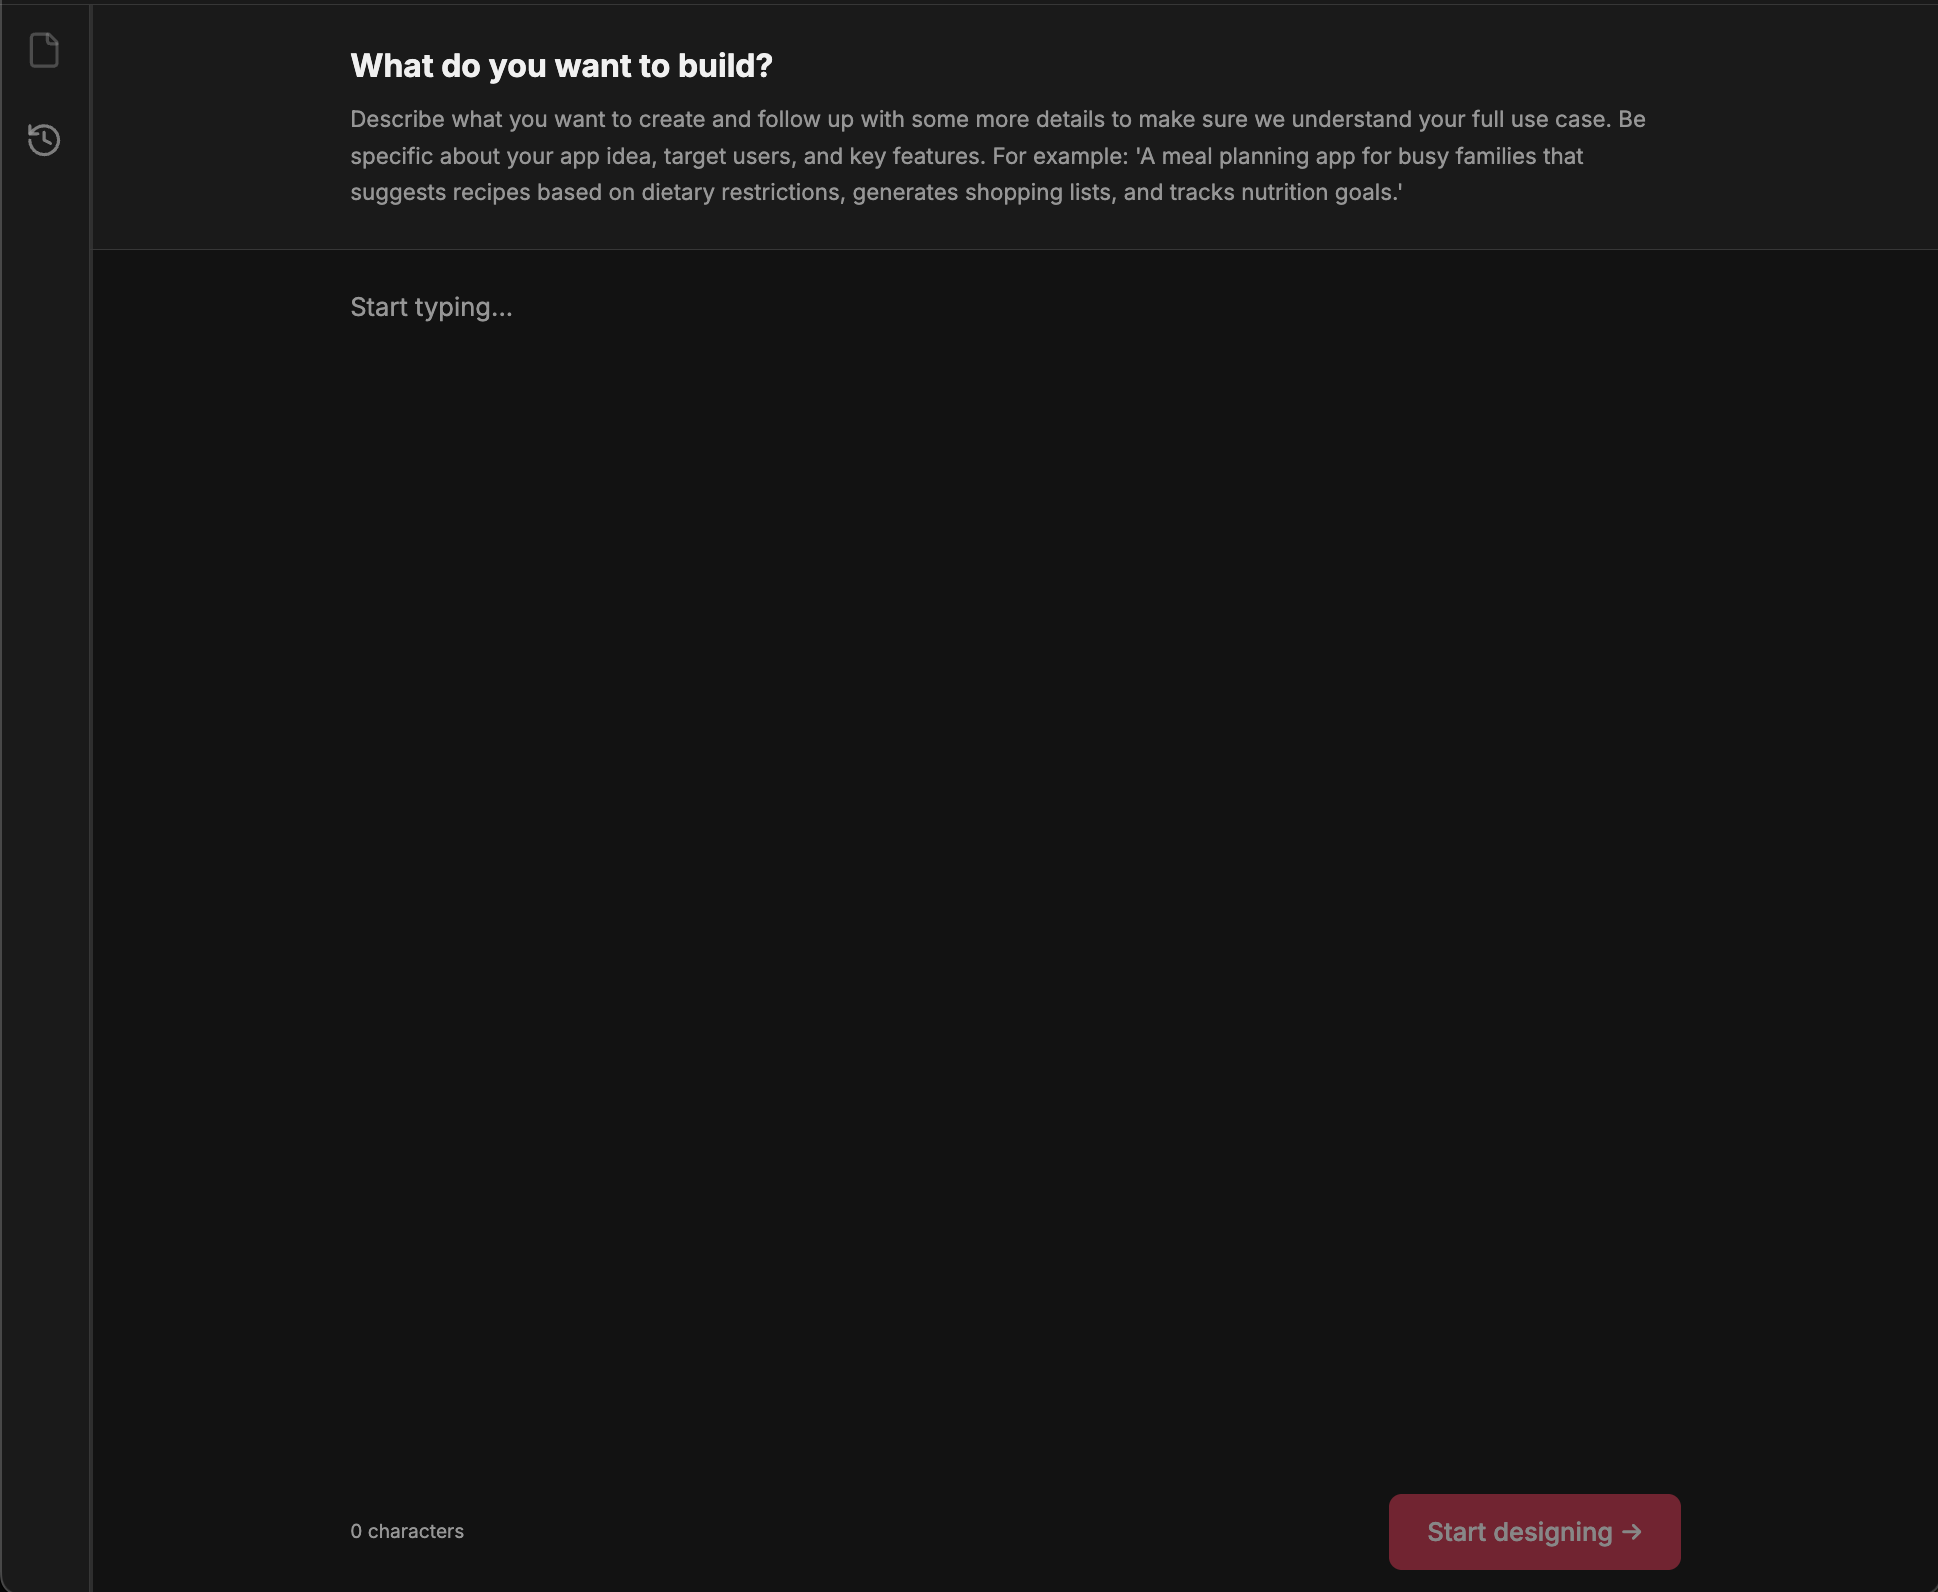
Explain your idea, and hit 'Start designing'!
For this example, we're working through a dating app with a new twist (speed dating) — but you should use whatever use case makes sense for your business.
Work through the questionnaire
The questionnaire is a key part of mowgli — this is where we try to refine your idea together with you by creating dynamic questions that scope your project. We will use this to generate a PRD (Product Requirements Document) that becomes the foundation for your application.
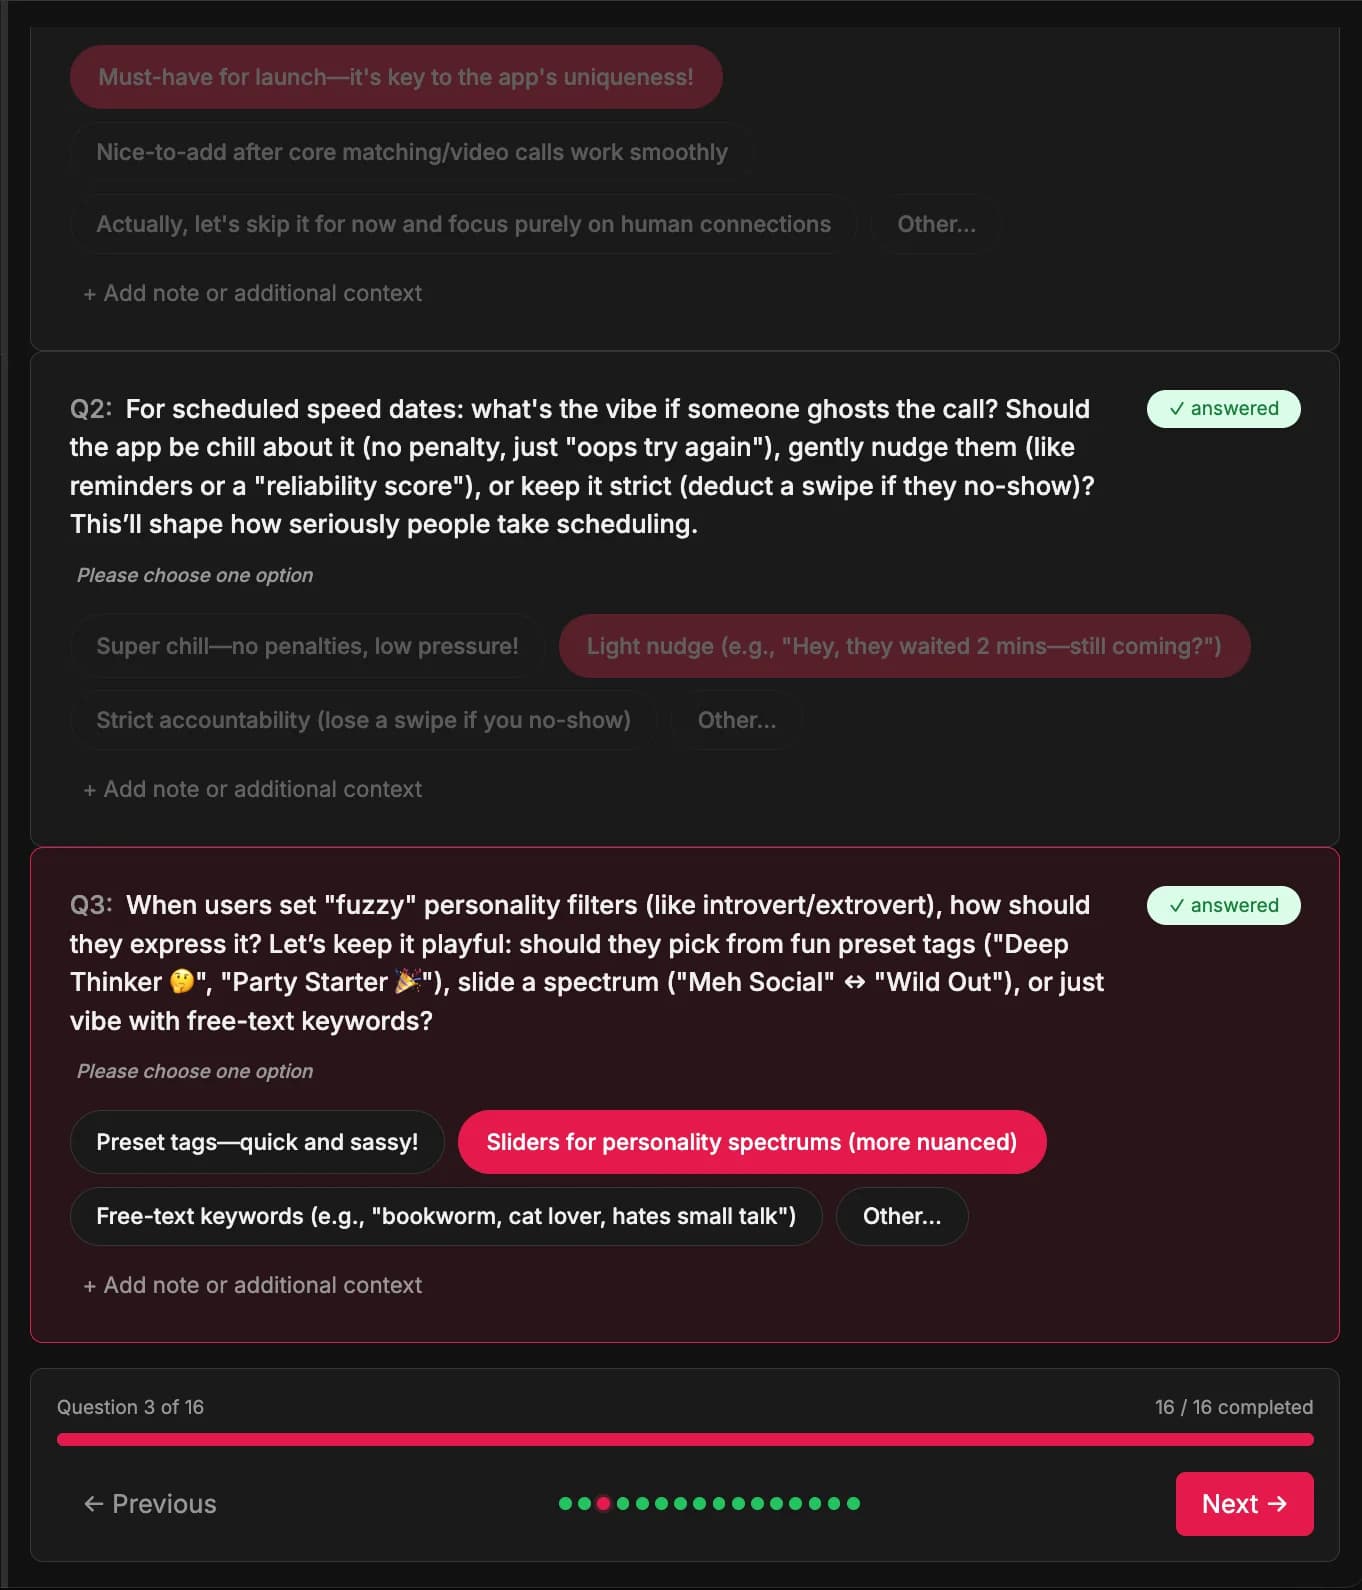
You'll first be presented with some initial questions for the first part of the scoping.
Single-choice questions: Some questions allow you to select one option
Multi-choice questions: Others let you select multiple options
Add context: Click "+ Add note or additional context" to provide more details

You can enrich your answers with additional context and notes.
Pro tip: If the options presented aren't really what you want, you can always select "Other" and explain exactly what you had in mind.
After answering the first set of questions, hit Submit and wait for clarifying questions. The last question of the questionnaire is always a way for you to add anything that the questionnaire didn't cover.
When you've filled in the second batch of questions, hit submit!
Spec view
You'll now get landed in the spec view. This is an overview of your entire application — user journeys, data model, and front end screens.
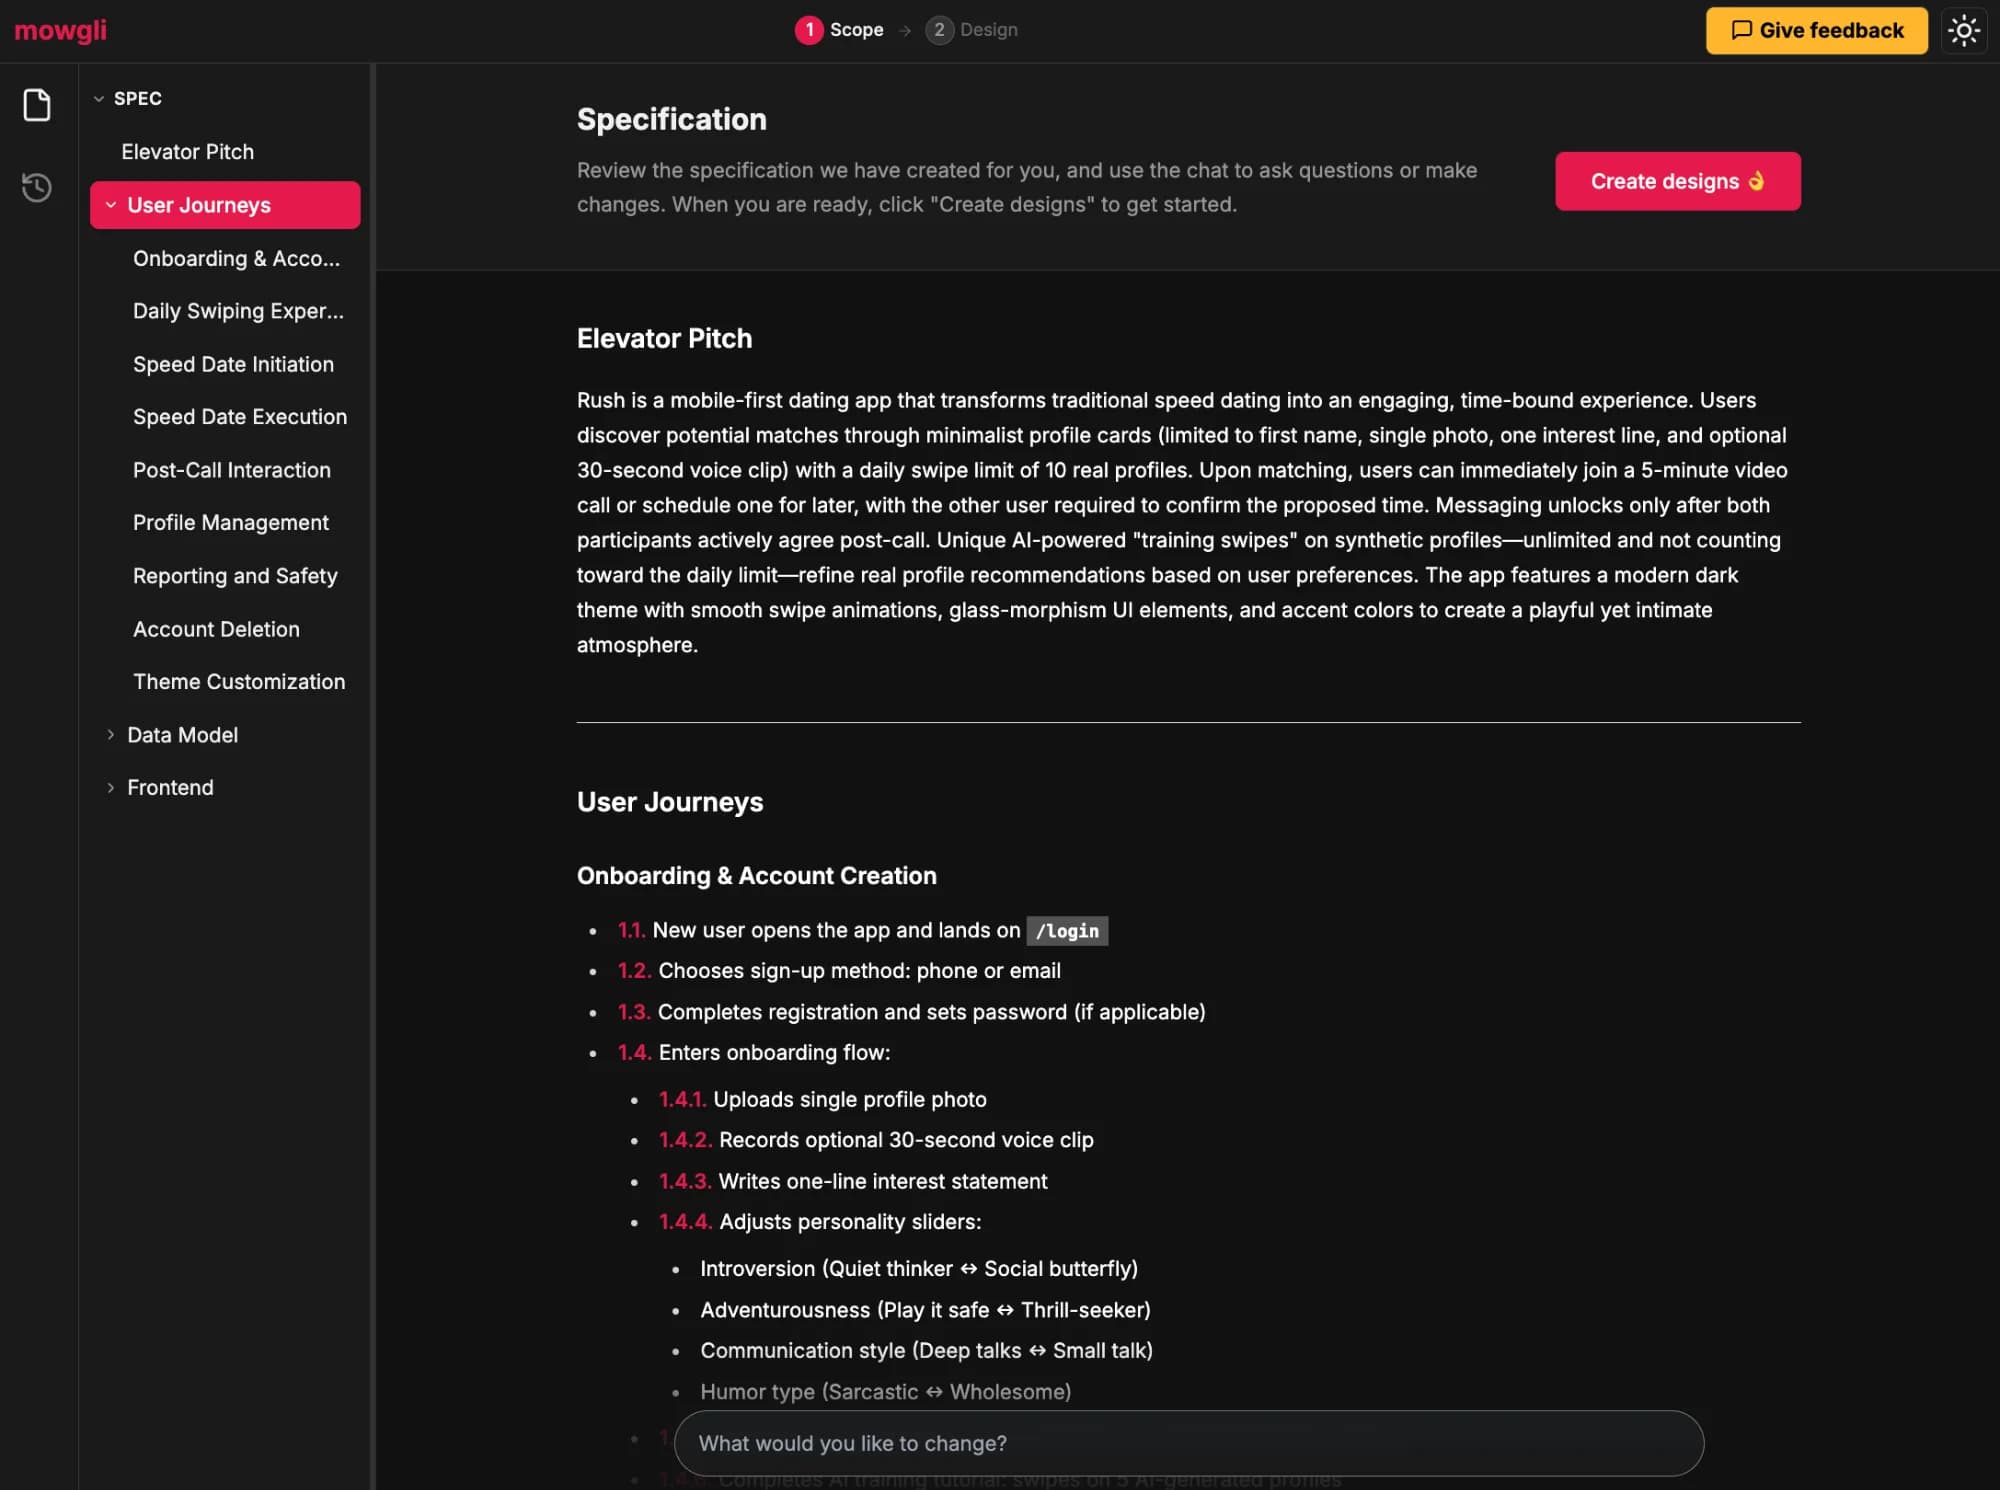
The spec view showing your entire application structure.
Interactive editing: You can make edits directly in the spec view. This is important for refining all product requirements and features before moving to design—ensuring the final designs include everything you need.
Generate designs
Once the spec is looking good, let's create some designs to generate some initial gens. Don't worry - you can change all of this later — this is just to get you started.
Pro tip: You can always go back and re-trigger the designs if you didn't like your results.
Pick your design
Once the designs have been generated, you'll see a couple of seeds of different designs. You can compare the themes one by one for a given screen.
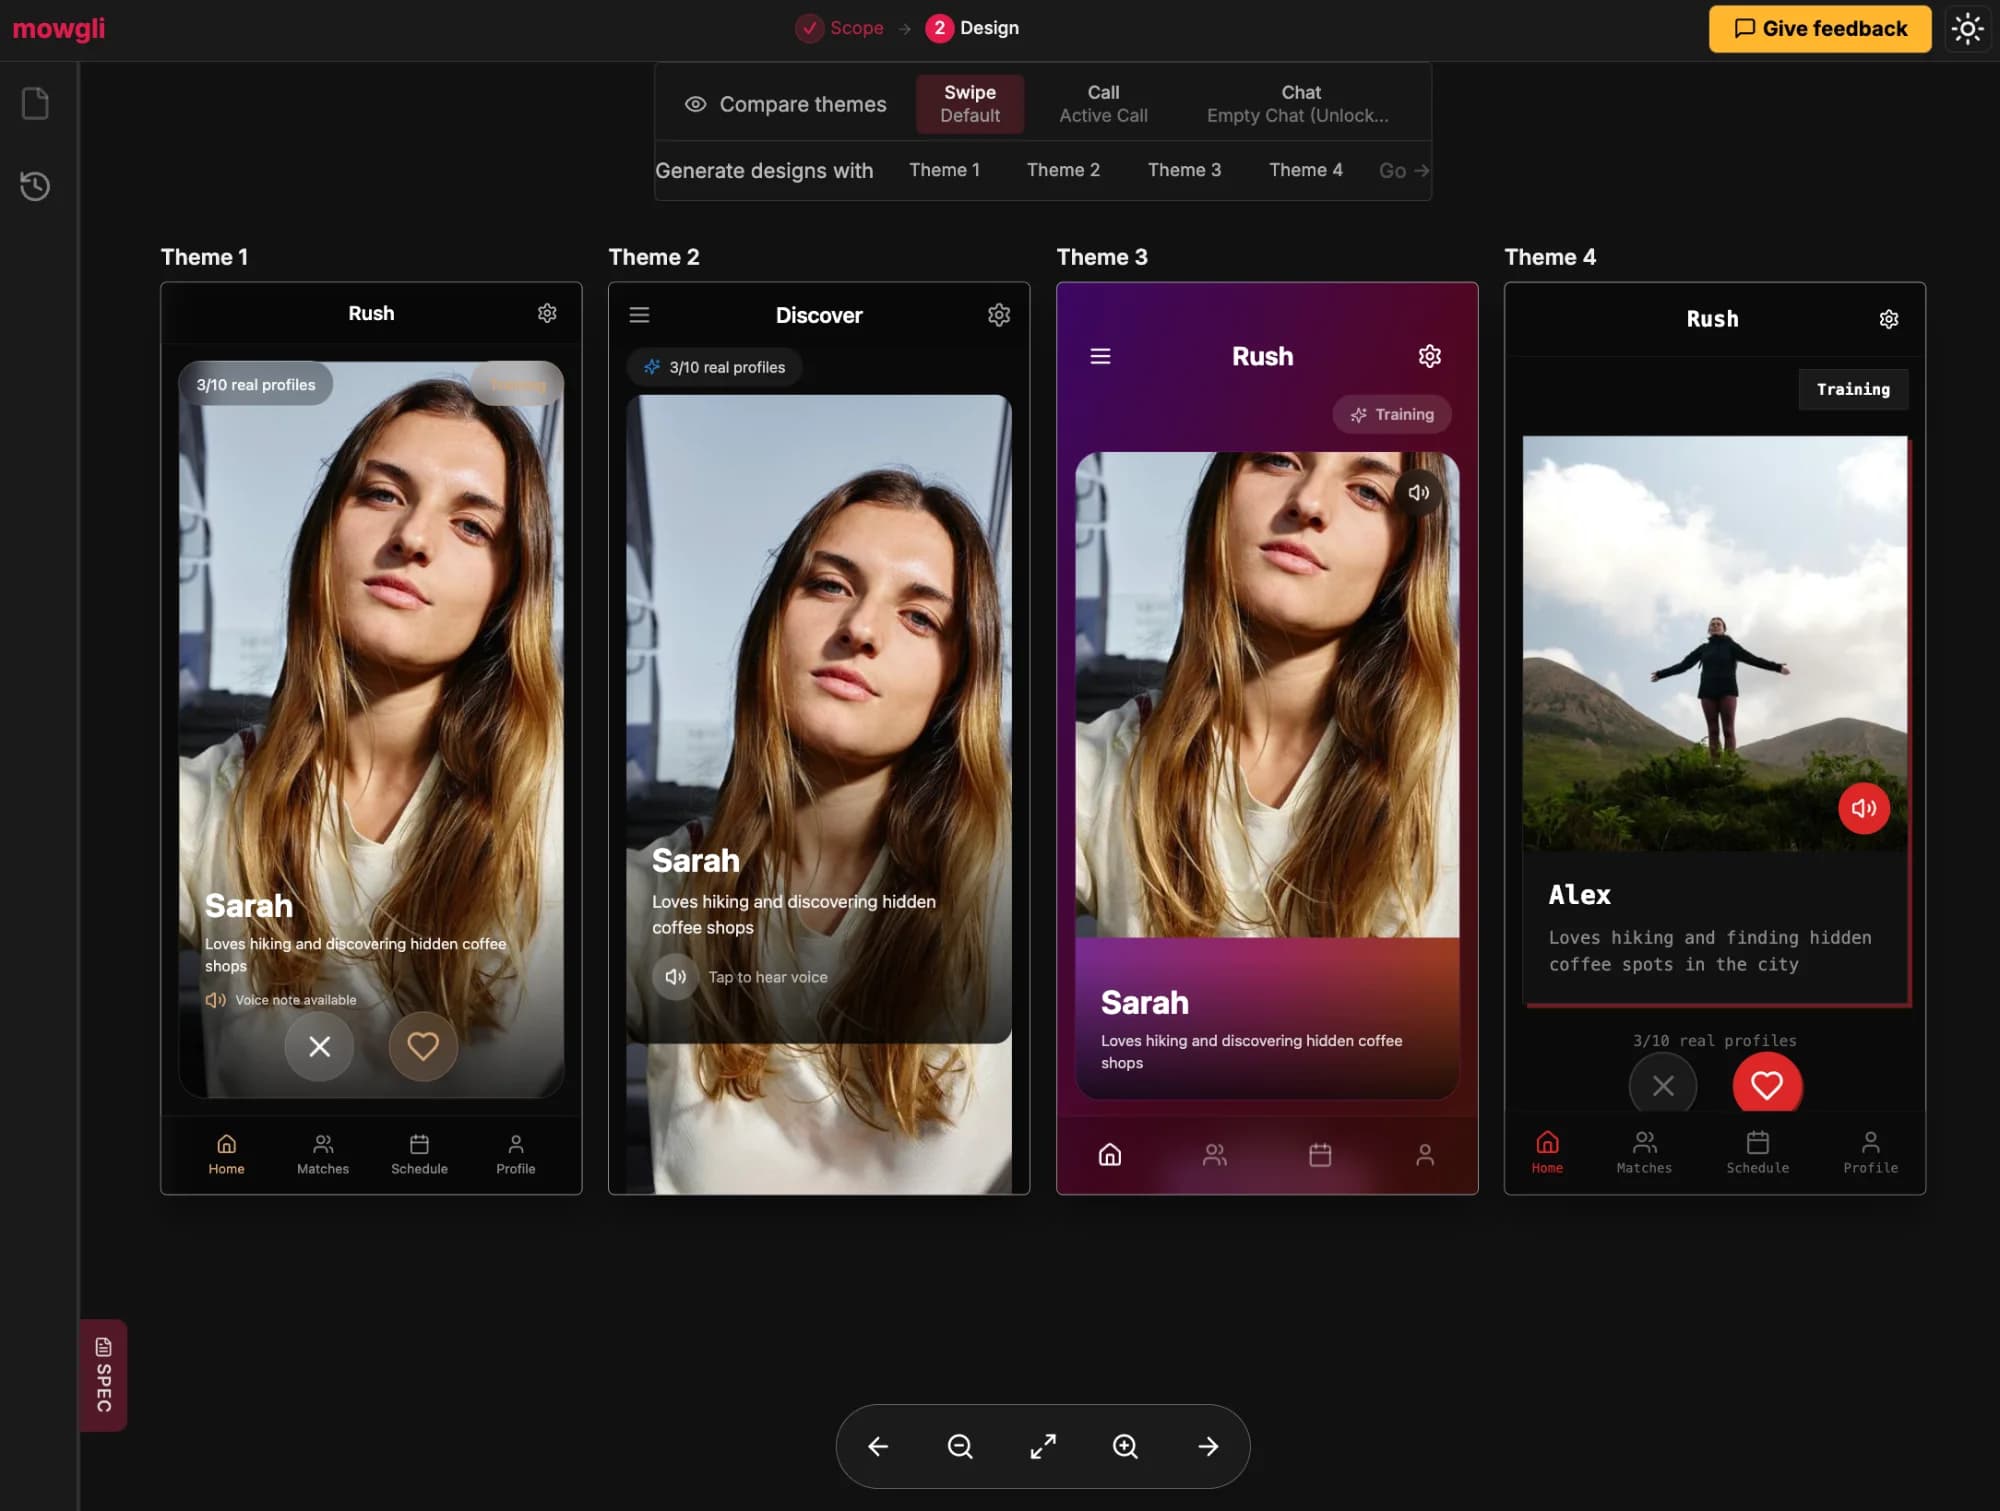
Compare different design themes side by side.
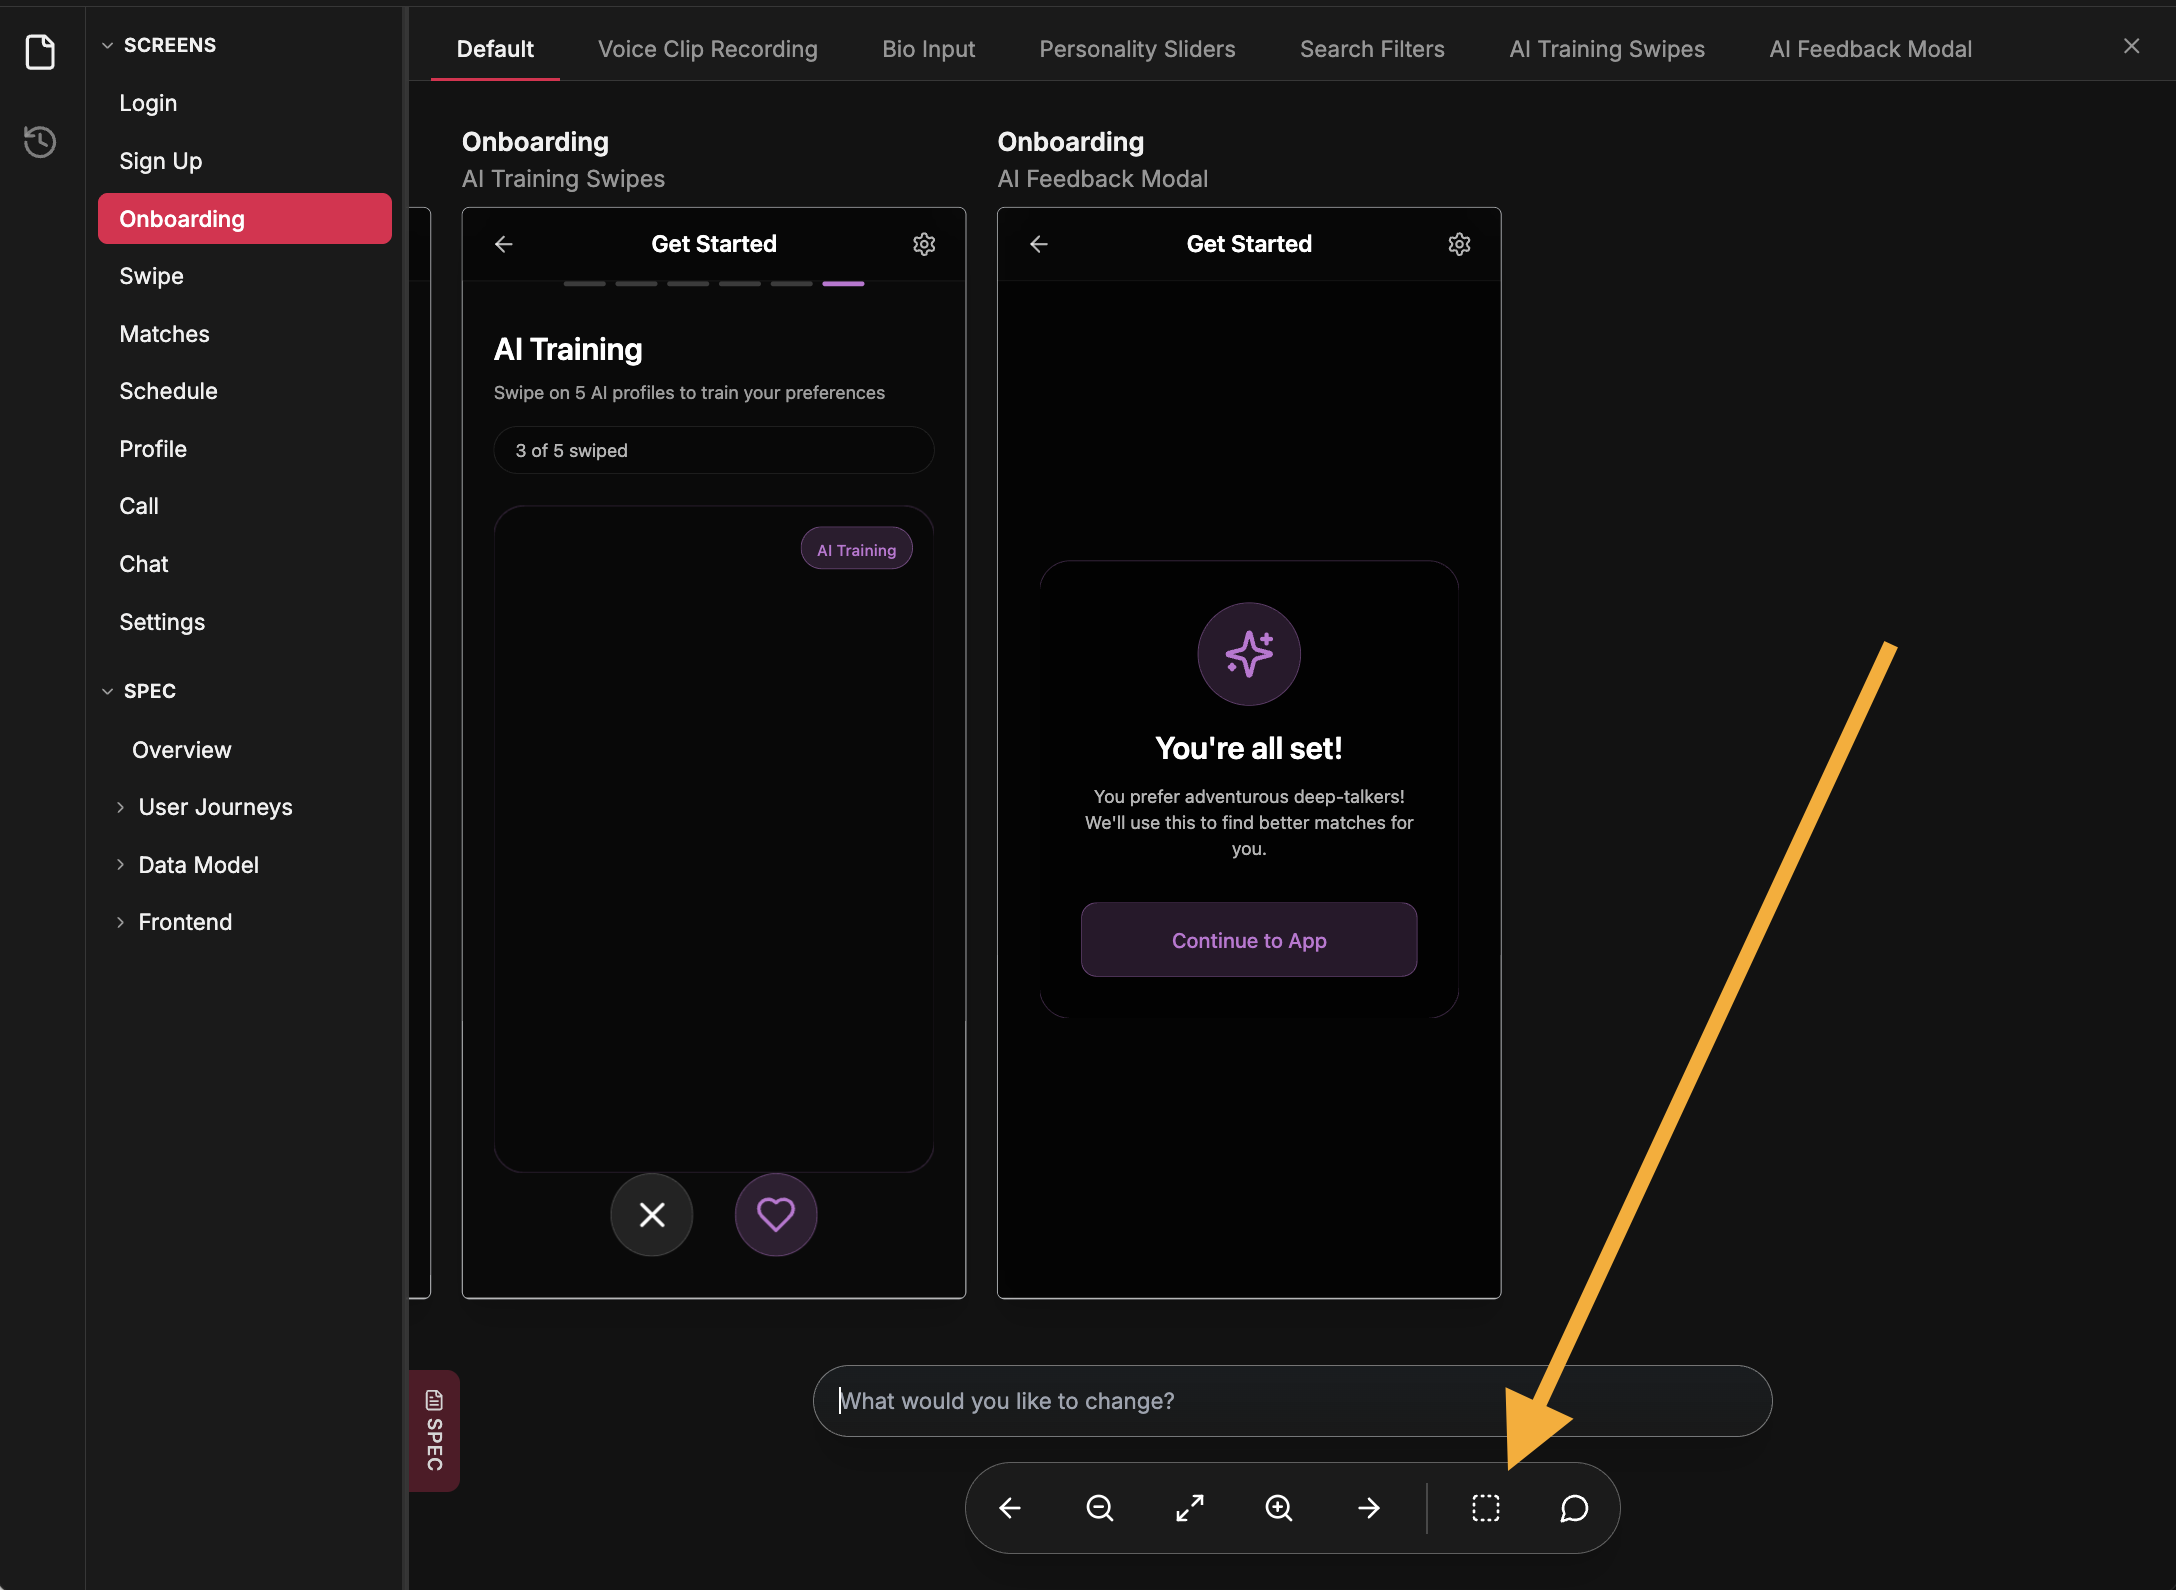
Pick your preferred theme, hit 'Go' and wait as we generate all the possible states for your application.
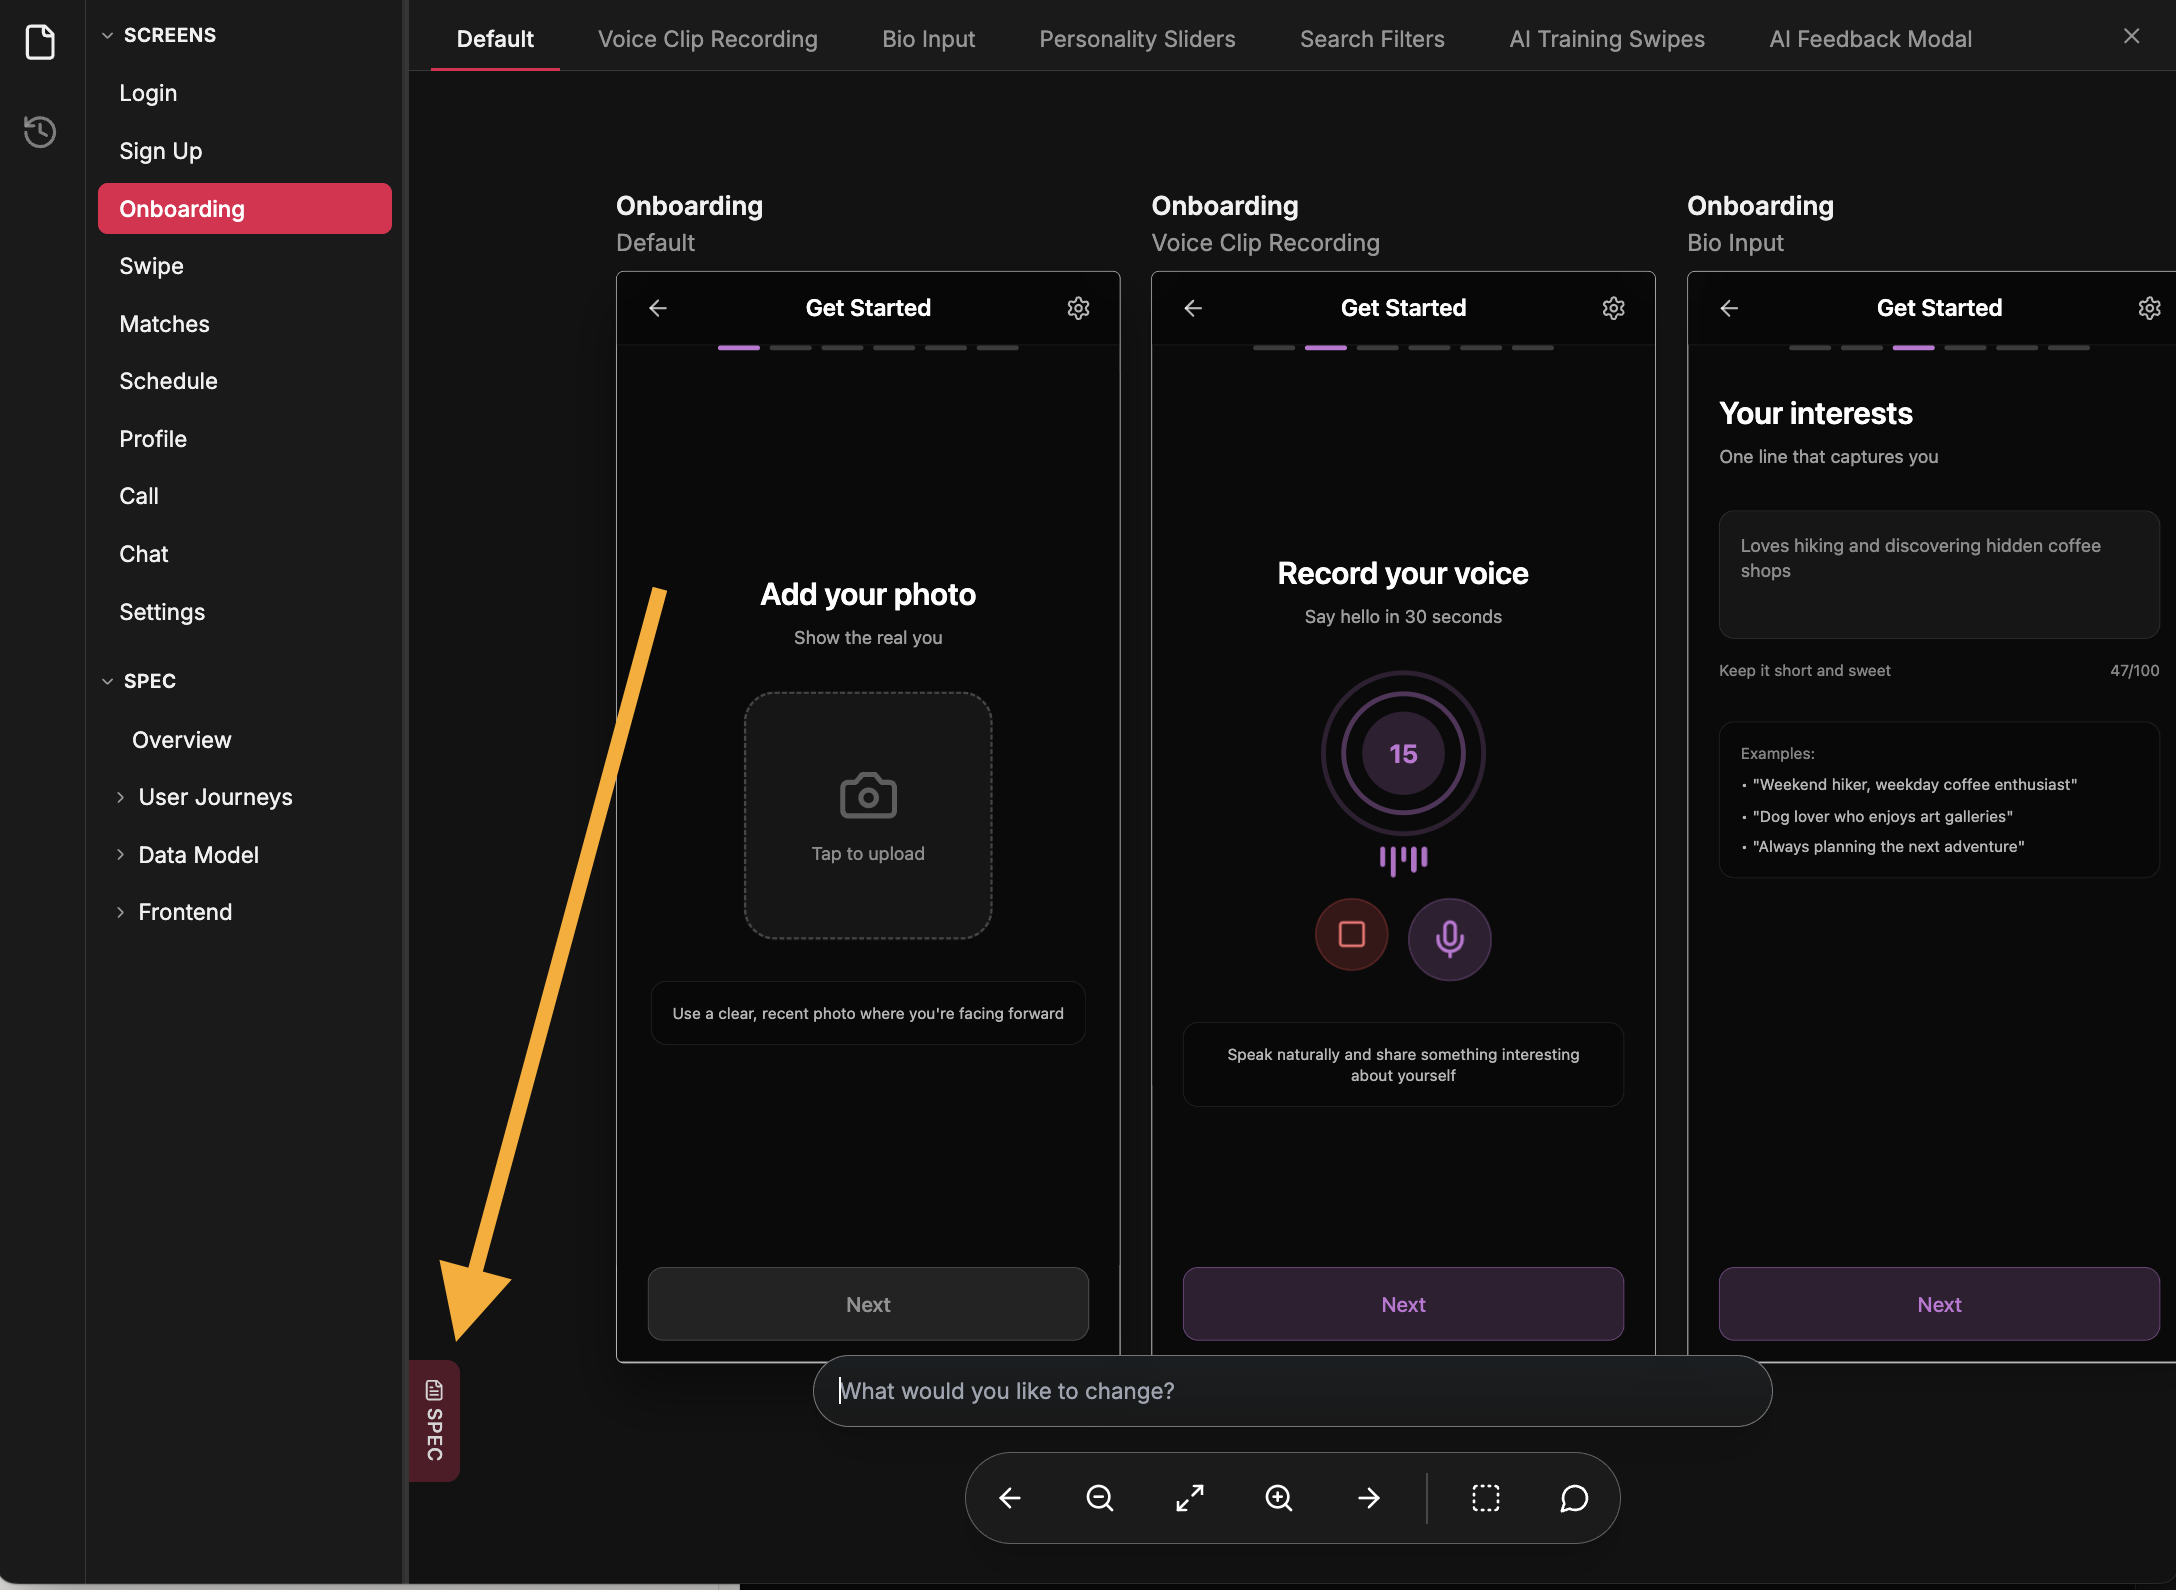
Explore all states and screens
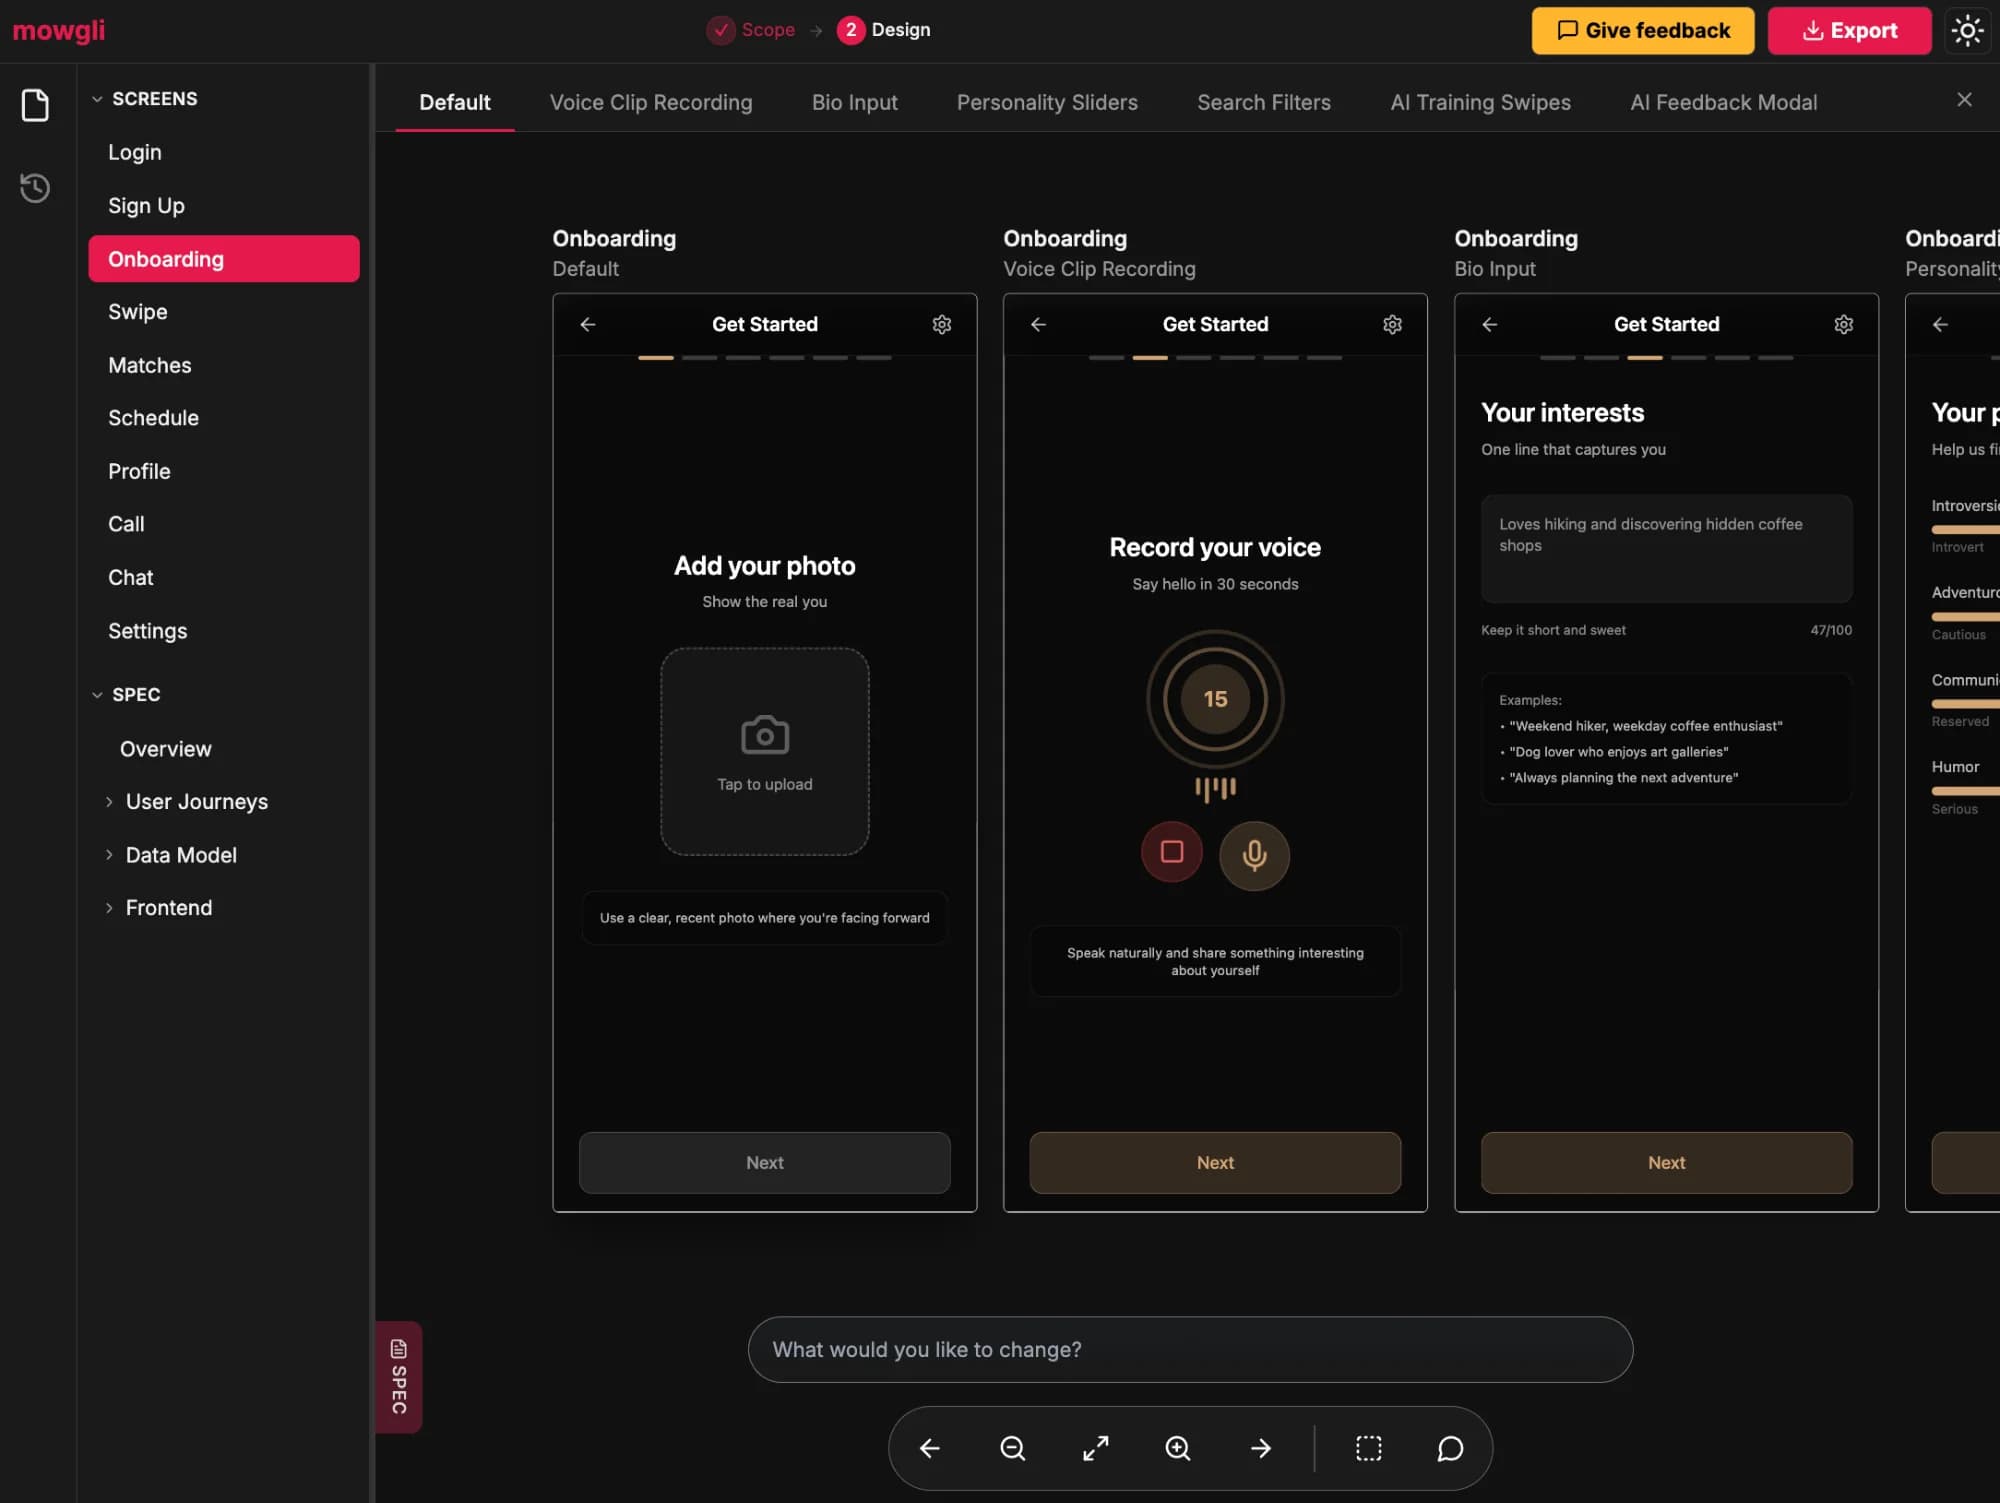
Your complete application with all screens and states.
All your screens are visible in the left sidebar
For any given screen, all possible states appear at the top
Navigate by clicking the top bar, using arrows, or as a free-form canvas
Make some changes
Let's try tweaking our designs! You can request changes to your app by using the chat box.
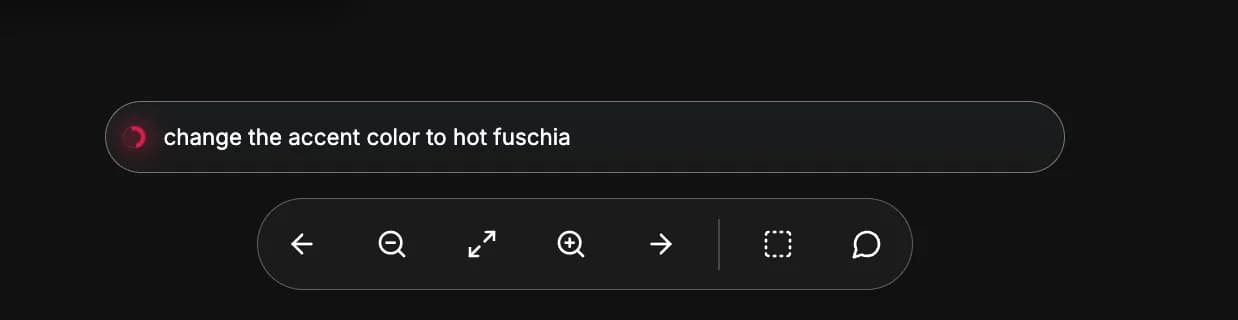
Explain the change you want — here we're asking to change the accent color to hot fuschia.
Wait for mowgli to update your designs. Every change is made to both spec and designs — they're always kept in sync.
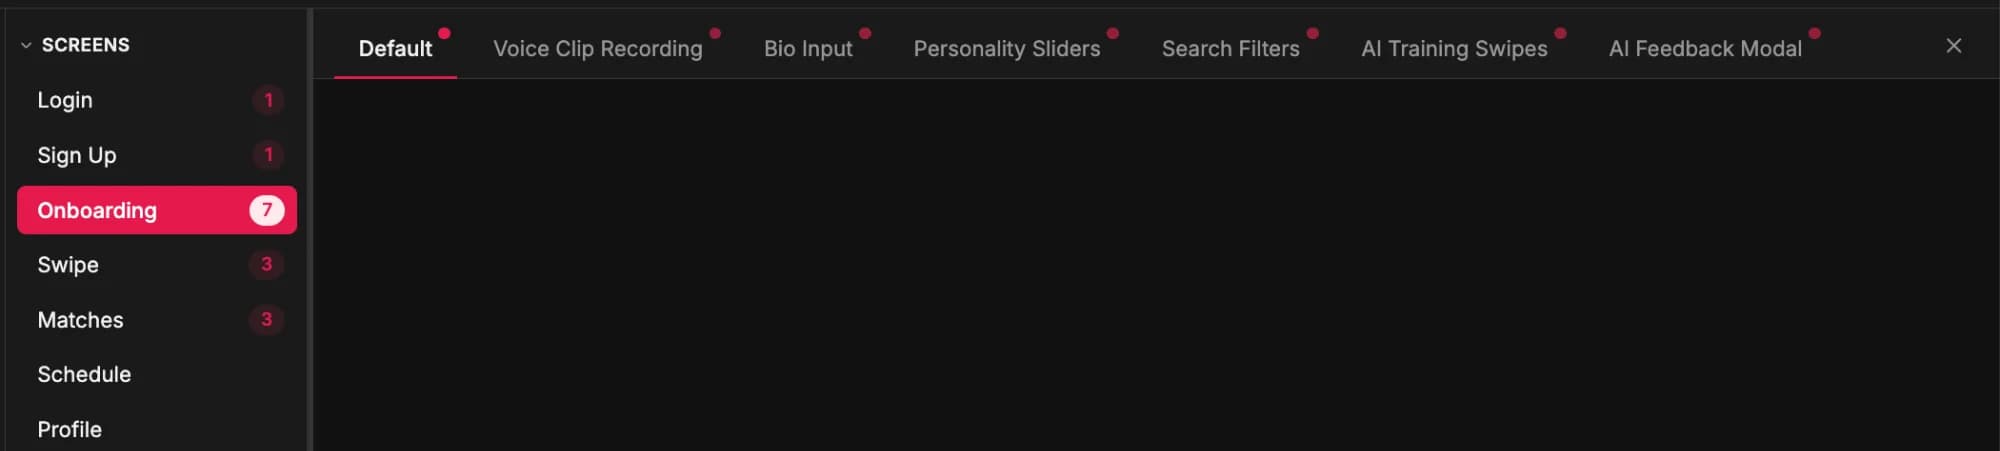
The sidebar and top bar will indicate which screens and states were impacted.
Click on the chat to see what was changed. If you're not happy, you can follow-up or access the history sidebar to undo.
Make targeted changes
You can use the selection tool for more targeted changes. Click the dashed rectangle, select your area, and describe your change.
Select an area on your design to make targeted changes.
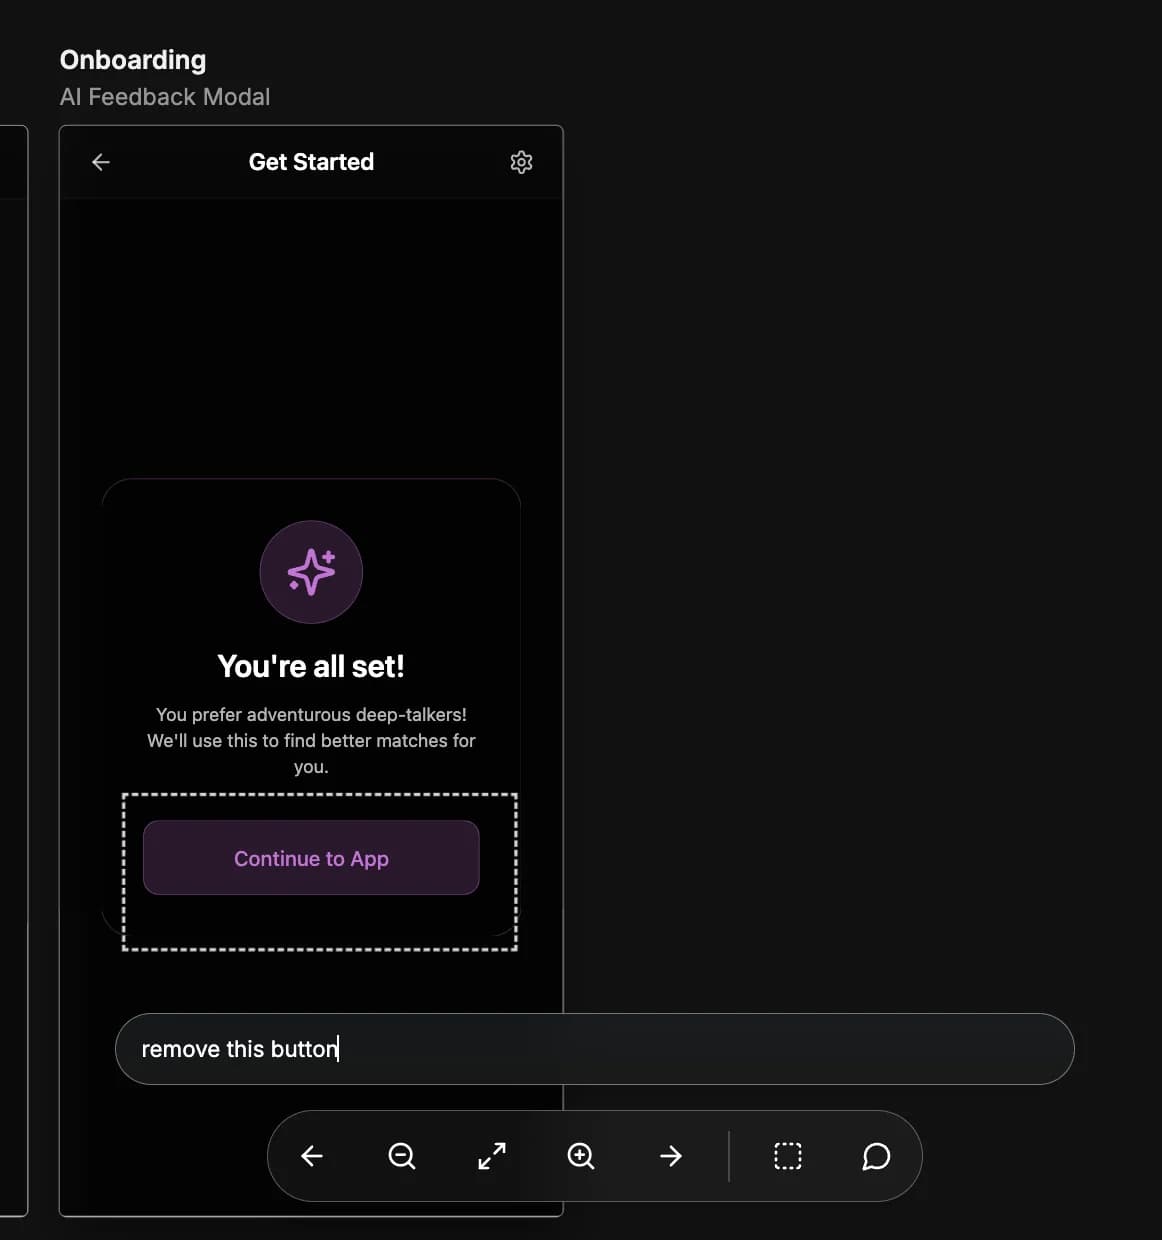
Use the chat to explain your change, like "remove this button".
Accessing the spec
You can quick-access the spec panel at any time to peek/inspect changes. You can also ideate directly on the spec and make changes there if you prefer working at the specification level.
Quick-access the spec panel to review your application structure.
Feel free to resize and inspect! Any functional changes will be reflected in both spec and designs 🤝
Access history
OptionalYou can access the history view in the sidebar to go back and change things. This will let you change anything in previous steps. Note that any changes create a new version!
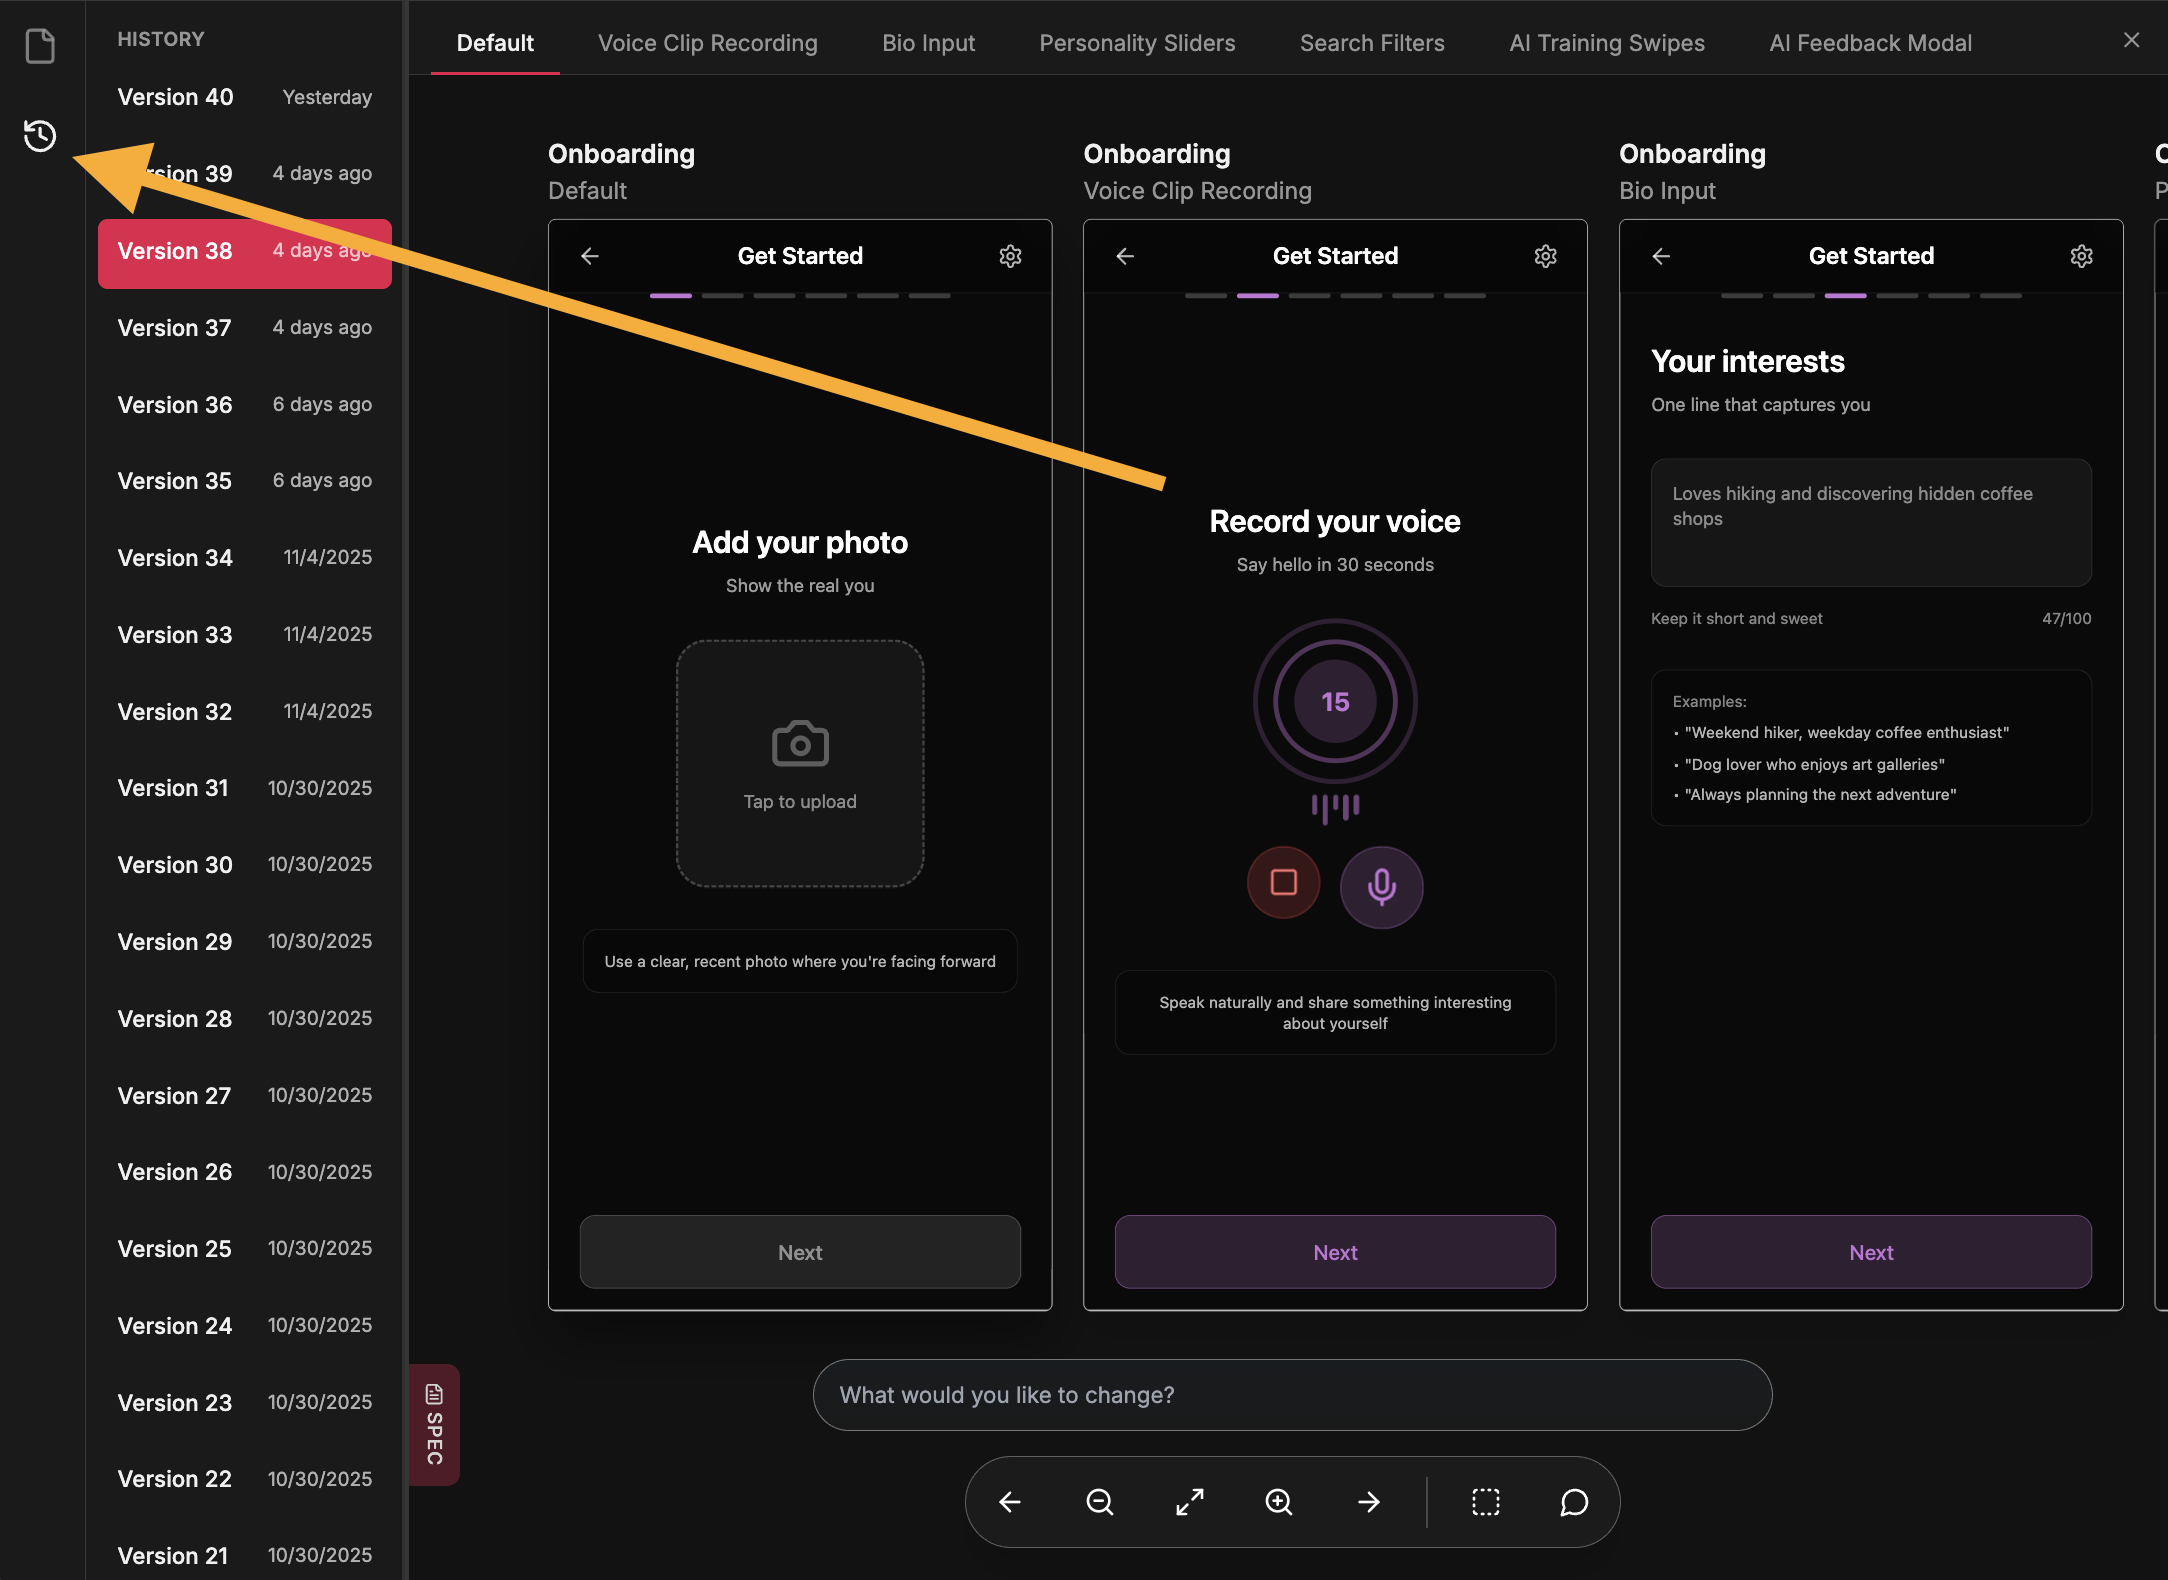
The history sidebar showing all your previous steps and versions.
Hand off to your codebase
Connect your coding agent (Claude Code, Codex, Cursor, or any MCP app) to Mowgli - it reads your spec and screens, pulls the designs into your codebase, and keeps design and code in sync both ways.
Click the Export button to download your files.
What you'll get
Prefer a manual handoff? Export still gives you a .zip with your spec and React + Tailwind code, or push to Figma.
Ready to get started?
You're all set! Start building amazing applications with mowgli.